Category: Posts (Page 4 of 47)

Indoor Arugula: How to Grow Peppery Greens on Your Windowsill

Growing your own food at home has taken on a new level of appeal in recent years, and nothing embodies the joy of homegrown greens quite like arugula. With its vibrant, peppery flavor and delicate leaves, arugula can transform a simple salad or sandwich into a gourmet experience. What’s even better is that you don’t need a sprawling backyard to enjoy fresh arugula; a sunny windowsill is all it takes to cultivate this lively green right inside your home.

Arugula, sometimes called rocket or rucola, thrives in cool, nutrient-rich conditions, making it perfect for indoor gardening. Unlike many vegetables, it grows quickly and rewards gardeners with a constant harvest when cared for properly. Watching tiny seeds sprout and develop into lush green leaves can be immensely satisfying, particularly if you’re living in an apartment or an area with limited outdoor space. The fact that you can grow it indoors year-round only adds to its appeal.
Choosing the Right Container and Soil

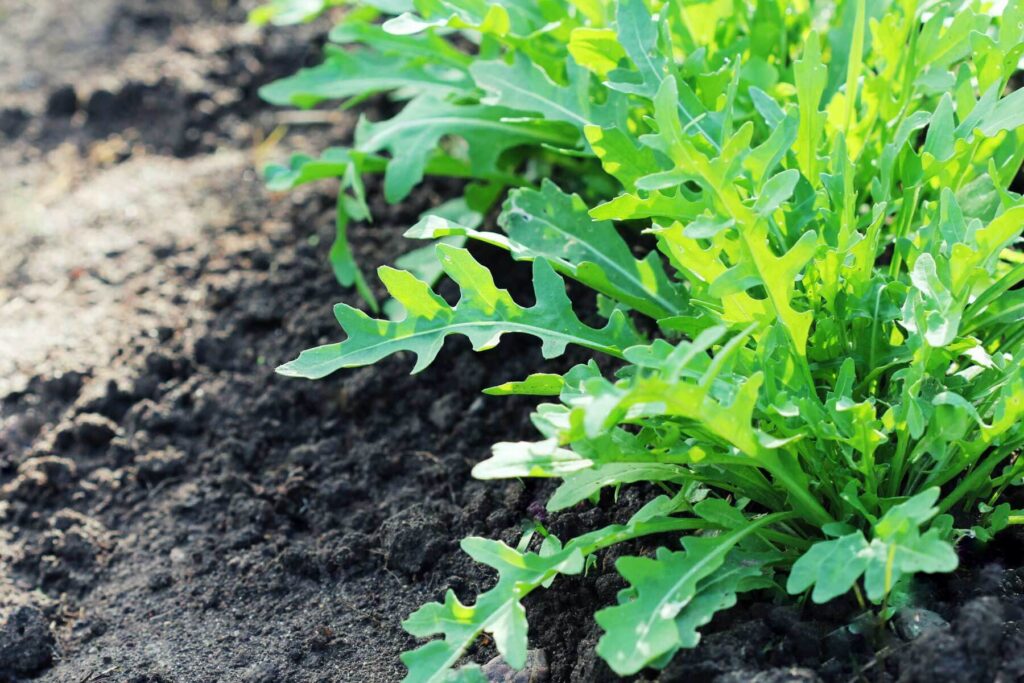
The foundation of a successful indoor arugula garden begins with choosing the right container. Arugula doesn’t require deep soil, so a shallow container with a depth of six to eight inches is ideal. What’s crucial is ensuring proper drainage to prevent waterlogged roots, which can quickly turn a promising crop into a soggy disappointment. Terracotta pots, ceramic planters, or even repurposed containers with drainage holes work beautifully. Avoid containers that retain too much moisture, as this can cause root rot and mold growth.

Soil selection is equally important. Arugula prefers light, well-draining soil rich in organic matter. You can use a high-quality potting mix designed for vegetables or create your own blend with compost, coconut coir, and a touch of perlite for aeration. The key is to provide nutrients while keeping the soil loose enough for roots to grow freely. Indoor arugula isn’t particularly demanding, but healthy soil ensures robust, flavorful leaves and reduces the likelihood of stunted growth.

Lighting: Let There Be Sun

Sunlight is the lifeblood of any indoor garden. Arugula thrives in bright, indirect light, and a south-facing windowsill is often the perfect spot. Ideally, your plants should receive at least four to six hours of sunlight each day. If natural light is insufficient, supplement with grow lights. LED grow lights are particularly effective because they provide the right spectrum for leafy greens and produce minimal heat, reducing the risk of scorching your plants.

Position your containers so that leaves are evenly exposed to light. Arugula grown in low-light conditions may become leggy and bitter, while consistent illumination encourages compact, tender growth. Rotating your pots every few days ensures all sides receive sunlight, promoting uniform development and preventing the leaves from stretching toward the window in a desperate search for light.

Planting and Germination

Arugula seeds are tiny, almost dust-like, yet they hold the potential to produce a verdant, peppery bounty. Scatter the seeds evenly over the prepared soil surface and cover them lightly with a thin layer of soil or vermiculite. Unlike some vegetables, arugula doesn’t require deep planting; a shallow covering is sufficient to protect seeds while allowing them to germinate quickly.

Water gently after planting, using a spray bottle to avoid washing away the seeds. Keep the soil consistently moist but not soggy. Germination usually occurs within five to seven days, and it’s a magical moment to see tiny green sprouts emerge from the soil. At this stage, it’s crucial to maintain steady moisture and warmth. Indoor environments often have fluctuating temperatures, so finding a stable spot near your window or under a gentle grow light will help seedlings thrive.
Caring for Your Indoor Arugula

Once your arugula sprouts have emerged, the next challenge is nurturing them into a full harvest. Thinning seedlings is an important step, as overcrowded plants can compete for light and nutrients, leading to weaker growth. Space the plants about two inches apart to allow adequate airflow and room for leaves to flourish. Even indoors, proper spacing helps prevent disease and ensures each plant receives enough resources.

Watering is another critical factor. Arugula prefers consistent moisture, but overwatering can be disastrous. Check the soil daily by touching the surface; if it feels dry, it’s time to water. Using a saucer under the container helps catch excess water and prevents damage to your windowsill or countertop. Additionally, occasional feeding with a diluted liquid fertilizer can boost growth, particularly if you’re harvesting leaves regularly. Organic options like fish emulsion or seaweed extract provide essential nutrients without overwhelming young plants.

Temperature and humidity play a surprisingly large role in indoor arugula cultivation. These greens favor cooler conditions, ideally between 60 and 70 degrees Fahrenheit. High temperatures can cause arugula to bolt, sending up a flower stalk and leaving leaves bitter. Indoor air tends to be drier than outdoor conditions, so misting plants lightly or placing a small humidifier nearby can help maintain optimal moisture levels in the leaves.

Succession Planting for Continuous Harvest

One of the joys of growing arugula indoors is the ability to enjoy a continuous harvest with careful planning. Instead of planting all your seeds at once, consider succession planting every two to three weeks. This approach ensures that as one batch reaches maturity, another batch is ready to take its place, giving you a steady supply of fresh leaves throughout the year.

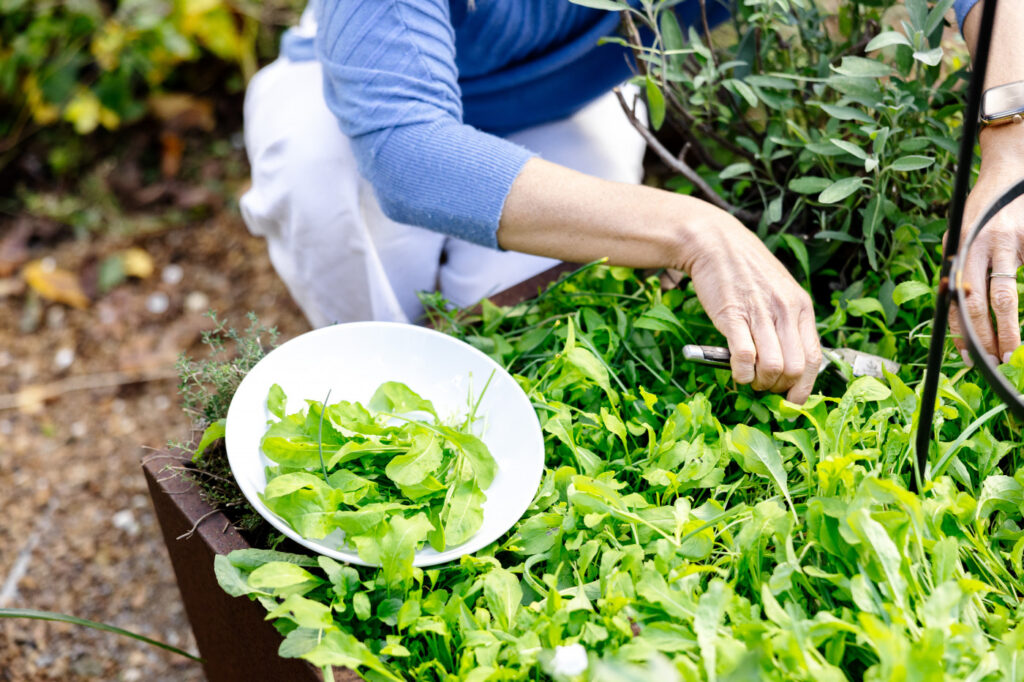
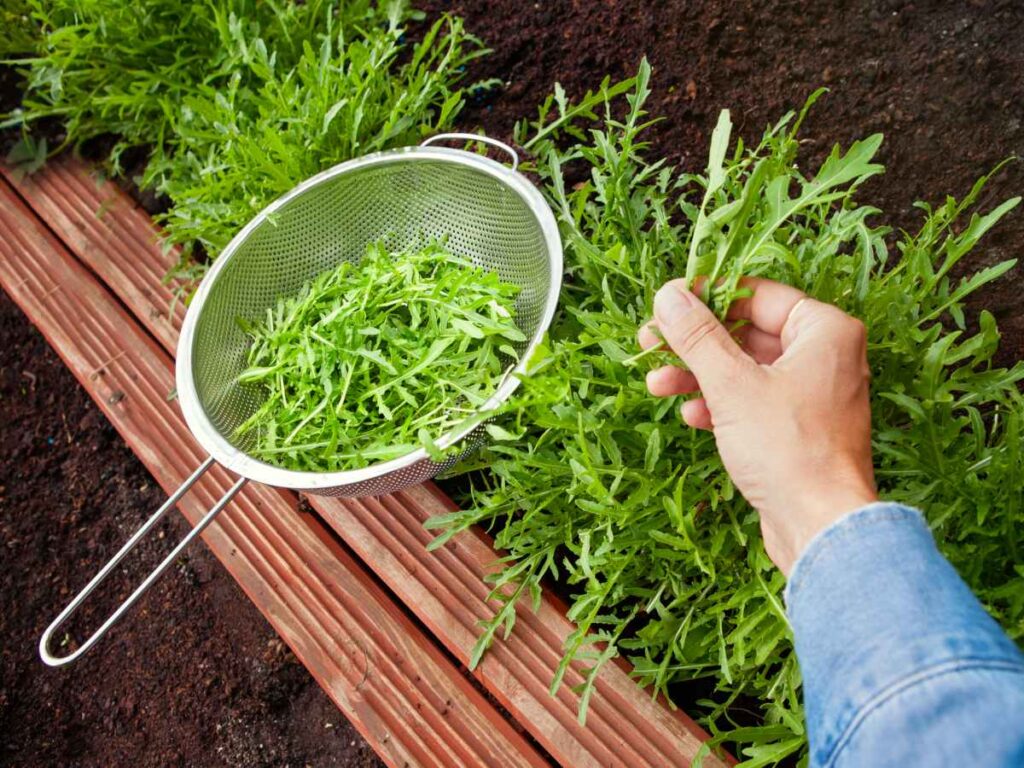
Harvesting arugula is simple and rewarding. Young leaves are tender and mild, perfect for salads and sandwiches, while older leaves develop a stronger, more peppery flavor that adds depth to cooked dishes. Use scissors to snip leaves just above the soil line, leaving the roots intact to encourage regrowth. With regular care, many indoor arugula plants will produce multiple harvests over several weeks.

Pests and Common Issues

Even indoors, arugula can face challenges. Aphids, whiteflies, and fungus gnats sometimes appear, particularly in environments with stagnant air or overwatering. The key to prevention is vigilance: inspect leaves regularly for signs of pests and address issues promptly. A gentle spray of water or an insecticidal soap can often resolve minor infestations without resorting to harsh chemicals. Maintaining proper airflow and avoiding overcrowding also reduces the likelihood of disease and keeps plants healthy.

Another common issue is bolting, where plants prematurely flower due to stress, heat, or insufficient light. While bolted arugula is still edible, the leaves become bitter and less desirable. Providing consistent light, cool temperatures, and regular harvesting helps delay bolting and keeps your greens tender and flavorful.

Culinary Uses and Enjoyment

The reward for growing arugula indoors extends far beyond the satisfaction of cultivation. The flavor is unmistakable—peppery, slightly nutty, and vibrant. Freshly harvested arugula elevates salads, sandwiches, and wraps, while also adding depth to soups, pestos, and sautés. Young, tender leaves are ideal for raw applications, whereas mature leaves can withstand brief cooking to mellow their spiciness.

Indoor-grown arugula has the added advantage of being pesticide-free and incredibly fresh. The ability to snip a handful of greens moments before eating provides a sensory experience unmatched by store-bought alternatives. Sharing a salad grown entirely in your windowsill garden is not just a culinary delight but a personal accomplishment that connects you to the rhythm of nature, even in an urban apartment.
Embracing the Indoor Gardening Lifestyle

Growing arugula on your windowsill is more than a practical endeavor; it’s a small act of mindfulness and creativity. The process teaches patience, attention to detail, and an appreciation for the delicate interplay between light, water, and soil. Indoor gardening offers a unique opportunity to reconnect with the natural world, bringing greenery and life into living spaces that might otherwise feel disconnected from nature.

The simplicity of arugula cultivation, coupled with the immediacy of the harvest, makes it an ideal starting point for anyone new to indoor gardening. Over time, you may find yourself experimenting with companion greens, herbs, or even small vegetables, gradually creating a thriving indoor ecosystem. Each harvest becomes a celebration, a reminder that growth is not only about food but also about nurturing a sustainable, joyful relationship with the earth—even if it’s just a windowsill’s worth of soil.

Conclusion

Indoor arugula gardening transforms a simple windowsill into a flourishing green haven, offering both visual delight and culinary satisfaction. With the right container, nutrient-rich soil, sufficient light, and attentive care, anyone can cultivate peppery, flavorful arugula year-round. From seed germination to continuous harvest, the process is engaging, rewarding, and surprisingly therapeutic. Beyond the practical benefits, growing your own arugula connects you to the rhythms of nature, cultivates mindfulness, and elevates the simple act of eating into a celebration of life and growth. Whether you’re a seasoned gardener or just beginning your journey, indoor arugula is a delicious, achievable, and endlessly rewarding endeavor.

Companion Planting with Fennel: Boosting Your Garden’s Health and Diversity

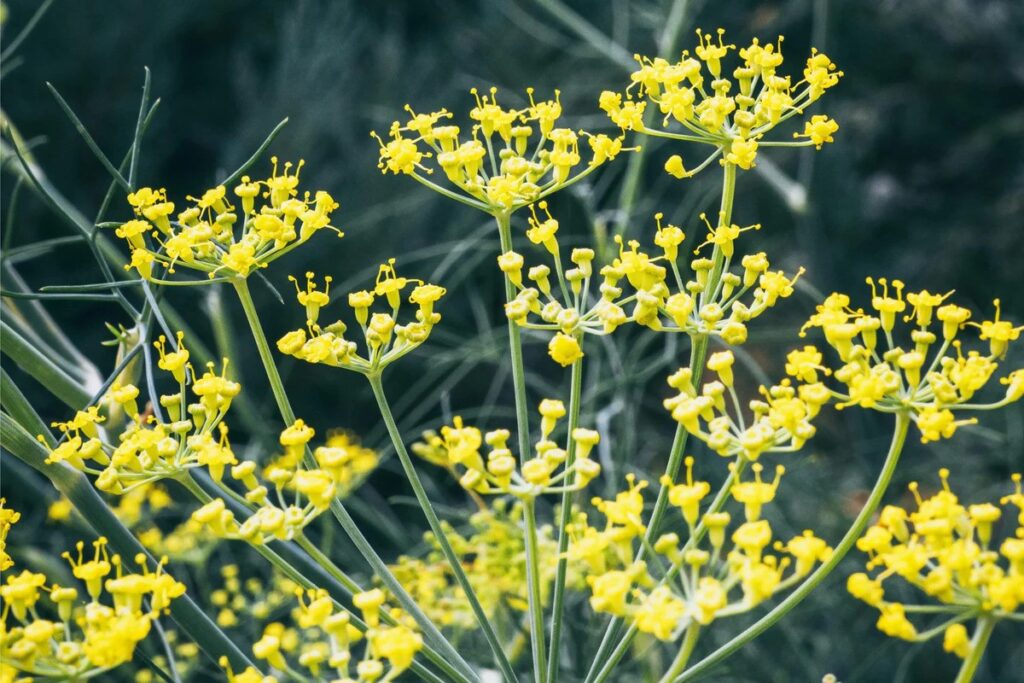
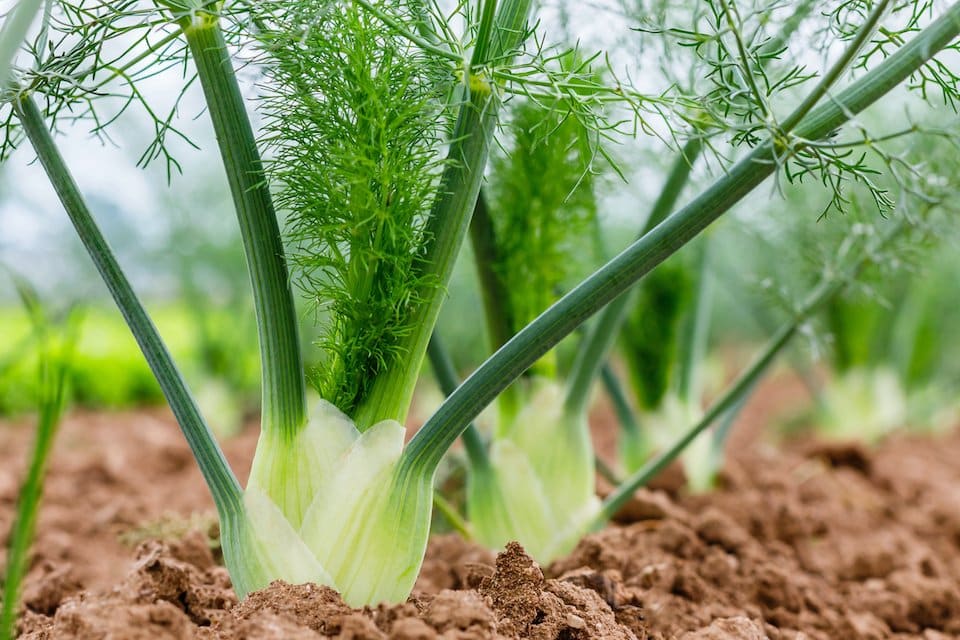
Fennel is one of those magical garden plants that seems simple at first glance, yet reveals layers of depth and purpose when you truly get to know it. Its feathery green leaves, aromatic bulb, and delicate seeds not only delight the senses but also hold incredible potential for companion planting. Understanding how to integrate fennel into your garden is about more than aesthetics; it’s about cultivating an ecosystem where plants thrive together, pests are naturally controlled, and your garden reaches its fullest potential.

The Allure of Fennel in the Garden

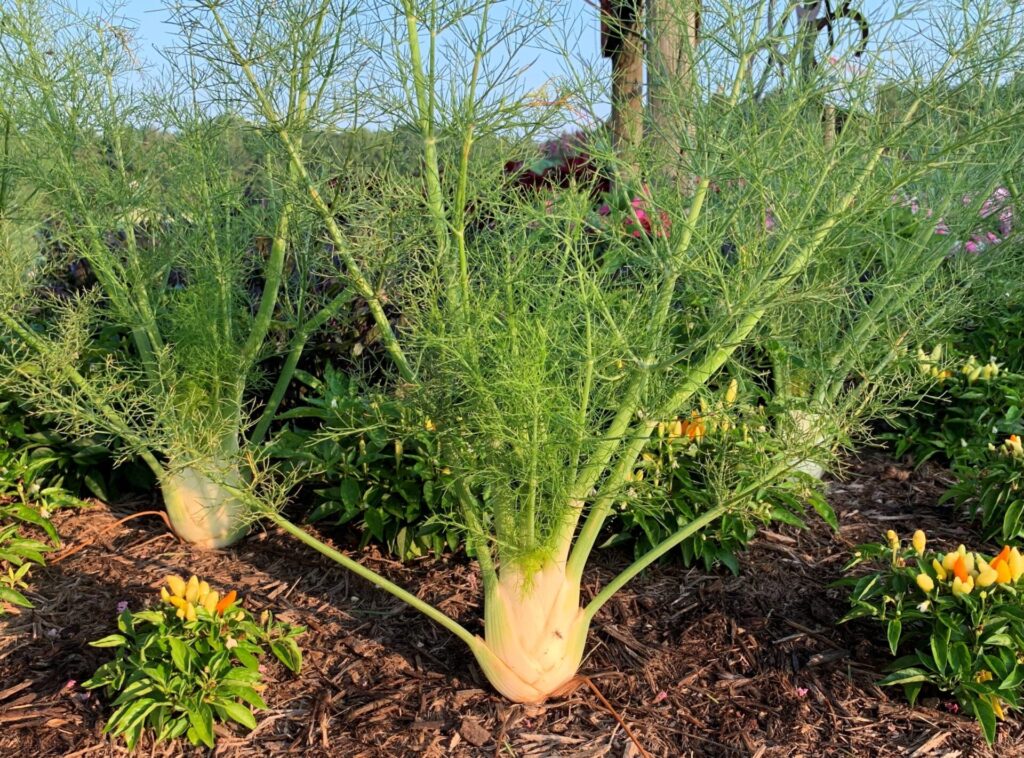
The first thing that strikes anyone who grows fennel is its aromatic quality. From the moment the seeds sprout, a subtle licorice scent fills the air, attracting beneficial insects while keeping certain pests at bay. Unlike many ornamental herbs, fennel is both beautiful and functional. Its tall, graceful stems provide structure to a garden bed, while the bulb offers a culinary reward for those patient enough to nurture it. The delicate fronds aren’t just decorative; they serve as a haven for predatory insects that feed on aphids, caterpillars, and other common garden nuisances. This dual role as both a visually appealing plant and a biological ally makes fennel an excellent candidate for companion planting.

Understanding Fennel’s Planting Needs

Before exploring companion planting combinations, it’s important to understand fennel’s basic growth requirements. Fennel thrives in full sun and prefers well-drained soil with a neutral to slightly acidic pH. While it is moderately drought-tolerant, consistent watering during dry periods ensures that the bulbs remain tender and flavorful. Fennel’s long taproot means it benefits from deep, loose soil, which allows the roots to expand without restriction.

Timing is crucial when planting fennel. Sow seeds directly into the garden in early spring or late summer, depending on your climate. Fennel does not transplant well, so giving it space from the beginning is essential. As it grows, the plant can reach impressive heights, with some varieties standing over four feet tall. This verticality makes fennel a natural companion for shorter plants, as it can offer light shade and shelter without overshadowing them.

Beneficial Companions for Fennel

One of the most intriguing aspects of companion planting is discovering which plants flourish near each other. Fennel is known for attracting beneficial insects such as ladybugs, parasitic wasps, and lacewings. These predators help control aphid populations and other pests that might otherwise damage neighboring crops. Fennel is especially effective near brassicas, like cabbage, broccoli, and kale, which are susceptible to caterpillar infestations. The delicate fennel flowers provide nectar for parasitic wasps that lay eggs inside caterpillars, creating a natural pest control system.

Another valuable companion for fennel is dill. These two herbs share similar growing conditions, and their aromatic qualities can confuse pests that target nearby vegetables. Carrots also benefit from being planted near fennel, as the scent of fennel can mask the presence of carrots from root flies. However, gardeners should exercise caution with fennel’s proximity to certain plants. Tomatoes, for instance, often struggle when planted near fennel, as the aromatic compounds can inhibit their growth. Understanding these relationships allows gardeners to plan beds that maximize synergy and minimize conflict.

Fennel’s Role in Garden Biodiversity

Beyond its immediate benefits to nearby plants, fennel contributes to overall garden biodiversity. Its nectar-rich flowers attract a wide range of pollinators, including bees, hoverflies, and butterflies. This influx of pollinators doesn’t just benefit fennel; it boosts fruiting in neighboring crops and strengthens the ecological resilience of the garden. A diverse garden is inherently healthier, as a variety of plants, insects, and microorganisms interact to create a balanced system. Fennel’s ability to draw beneficial species makes it a keystone plant in many home gardens.

Fennel also offers shelter for ground-dwelling insects and small creatures that contribute to soil health. Ladybugs and lacewings often lay their eggs in fennel’s fronds, and as the larvae hatch, they begin consuming pests that might otherwise devastate vegetables. The plant’s deep roots help aerate the soil and pull nutrients closer to the surface, which benefits shallow-rooted companions. In this way, fennel supports both above-ground and below-ground biodiversity, creating a thriving garden ecosystem.

Integrating Fennel into Your Garden Design

Strategically placing fennel in your garden is as much about aesthetics as it is about functionality. Its height and feathery texture make it an excellent backdrop for lower-growing plants, creating layers of visual interest while also providing microclimates for sensitive crops. For example, planting fennel near lettuce or spinach can offer partial shade during the hottest part of the day, preventing leaves from bolting prematurely. Similarly, positioning fennel near brassicas can protect them from strong winds, which can damage delicate leaves.

Gardeners can also use fennel as a natural divider or focal point. In herb gardens, it pairs beautifully with basil, thyme, and oregano, adding height and fragrance to a flat landscape. In vegetable beds, fennel’s vertical presence can create a sense of enclosure, subtly guiding visitors through pathways while fostering a sense of abundance and vitality. Its versatility in design mirrors its ecological versatility, making it a valuable plant both visually and functionally.

Fennel and Pollinator Support

Pollinators are the unsung heroes of any productive garden. Without bees, butterflies, and other pollinating insects, fruit and vegetable yields would plummet. Fennel’s clusters of tiny yellow flowers are magnets for these creatures. Unlike single-species plantings that bloom for only a brief period, fennel provides a steady supply of nectar over several weeks, sustaining pollinators during critical growing seasons. By planting fennel strategically, gardeners can create pollinator corridors that link different parts of the garden, ensuring that beneficial insects move freely and support a wider range of crops.

Moreover, fennel’s flowers serve as a food source for predatory insects that control garden pests. The dual function of attracting both pollinators and pest controllers highlights fennel’s unique position in companion planting. It is not merely a passive neighbor; it actively contributes to the health and productivity of the entire garden ecosystem.

Harvesting and Using Fennel

Companion planting with fennel isn’t just about what happens above ground in the garden. Harvesting fennel for culinary or medicinal use can be integrated seamlessly into your gardening routine. The bulb, which grows close to the soil, is tender and sweet, perfect for roasting, sautéing, or slicing raw into salads. The fronds, delicate and feathery, enhance sauces, soups, and garnishes, while the seeds provide an aromatic boost to baked goods, pickles, and spice blends.

Harvesting fennel thoughtfully ensures that it continues to support your garden even as you enjoy its culinary benefits. Leaving some plants to flower and set seed attracts pollinators and beneficial insects, while harvesting bulbs and fronds provides nourishment for your household. This balance between consumption and conservation mirrors the principles of companion planting itself: supporting life while reaping rewards in a sustainable manner.

Troubleshooting Fennel in Companion Plantings

While fennel offers numerous benefits, gardeners should be aware of potential challenges. Its aromatic compounds, while helpful against some pests, can inhibit the growth of certain vegetables such as tomatoes, beans, and peppers. Careful planning and spacing are necessary to ensure fennel’s advantages are maximized without negatively affecting sensitive neighbors.

Fennel can also become tall and leggy if not properly managed, casting excessive shade on low-growing plants. Regular trimming of fronds and selective harvesting of flower stalks can prevent this, keeping the plant attractive and functional. Additionally, monitoring for aphids and fungal diseases is important, even though fennel is generally resilient. Maintaining soil health through composting, mulching, and crop rotation further supports fennel’s performance and its positive influence on nearby plants.

Creating a Thriving Garden Ecosystem

At its core, companion planting with fennel is about creating a thriving, self-sustaining garden ecosystem. It requires observation, experimentation, and patience, but the rewards are profound. By understanding fennel’s growth habits, preferred companions, and ecological contributions, gardeners can design beds that are visually appealing, productive, and resilient. Fennel doesn’t just coexist with other plants; it actively enhances their growth, improves pest resistance, and supports pollinators that benefit the entire garden.

The beauty of fennel lies in its ability to bridge functionality and aesthetics. Its presence tells a story of thoughtful cultivation, where every plant serves a purpose, and every harvest contributes to a balanced system. For gardeners seeking to maximize the health and diversity of their spaces, fennel offers a compelling combination of elegance, utility, and ecological stewardship.

Embracing Fennel’s Potential

Incorporating fennel into your garden is more than planting an aromatic herb; it’s about embracing a philosophy of interconnectedness. Each frond, flower, and bulb plays a role in sustaining a vibrant ecosystem, reminding us that successful gardening is as much about relationships as it is about soil and sunlight. Fennel teaches patience, observation, and respect for the natural cycles that govern growth.

As you experiment with companion planting, observe the subtle ways fennel interacts with its neighbors. Notice the increase in pollinators, the reduction in pests, and the improved vigor of plants that grow nearby. Over time, you’ll discover that fennel’s true value extends beyond the plate—it is a living ally, a natural architect of garden health, and a catalyst for biodiversity.

Integrating fennel thoughtfully transforms a garden from a collection of individual plants into a dynamic, harmonious ecosystem. It offers a model for how humans can work with nature rather than against it, demonstrating that even a single plant can have profound impacts on the vitality, resilience, and beauty of a home garden.

Organic Pomegranate Cultivation: How to Maximize Yield and Fruit Quality at Home

Growing pomegranates at home is more than just a gardening hobby—it’s a deeply rewarding experience that connects you with nature while offering the satisfaction of harvesting vibrant, nutrient-rich fruits straight from your own backyard. Known as the “fruit of paradise” for its ruby-red arils, rich antioxidants, and symbolic significance across cultures, the pomegranate thrives under careful, attentive cultivation. However, achieving maximum yield and optimal fruit quality requires more than just planting a tree and waiting. It demands understanding the plant’s biology, its environmental needs, and the nuanced practices that encourage healthy growth in an organic setting.

Selecting the Right Variety and Location

The journey to a bountiful pomegranate harvest begins with choosing the right variety. Not all pomegranate types are suited for every climate, and selecting a cultivar that aligns with your local conditions is essential. Varieties like ‘Wonderful’ and ‘Angel Red’ are popular in home gardens due to their resilience and high-quality fruits. When choosing your planting location, consider sunlight, soil drainage, and air circulation. Pomegranates require full sun to produce sweet, flavorful fruits, so a spot that receives at least six hours of direct sunlight daily is ideal. Proper air circulation reduces the likelihood of fungal diseases, a critical factor when practicing organic cultivation.

Preparing the Soil for Optimal Growth

Healthy soil is the cornerstone of organic pomegranate cultivation. These trees thrive in loamy soil that drains well while retaining enough moisture to sustain growth. Before planting, enrich the soil with organic matter such as compost or well-rotted manure. This not only improves soil fertility but also enhances its structure, allowing roots to penetrate deeply and establish a strong foundation. Testing your soil’s pH is another important step; pomegranates prefer a slightly acidic to neutral range between 5.5 and 7.0. Adjusting the soil naturally, using lime or organic amendments, helps create an environment where the tree can flourish without chemical intervention.

Planting Techniques for Strong Establishment

Planting pomegranate saplings with care ensures a strong start, which significantly influences future yield. Dig a hole twice the size of the root ball and loosen the soil at the bottom to encourage root expansion. Place the sapling gently, spreading the roots evenly, and backfill with enriched soil. Water thoroughly after planting to settle the soil around the roots and eliminate air pockets. Mulching around the base with organic materials like straw or bark not only conserves moisture but also suppresses weeds and maintains a stable root temperature, creating the ideal microenvironment for growth.

Watering and Nutrient Management

Watering plays a crucial role in both yield and fruit quality. While pomegranates are drought-tolerant, consistent and adequate watering promotes healthy flowering and fruit development. Deep watering once or twice a week is preferable to frequent shallow watering, as it encourages the roots to grow deeper and strengthens the plant. When it comes to nutrients, organic cultivation relies on natural fertilizers rather than chemical alternatives. Compost tea, seaweed extract, and well-rotted manure provide essential macro and micronutrients while supporting soil microbiology. Regularly feeding your tree during active growth phases ensures vigorous shoots and well-formed fruits, while avoiding over-fertilization prevents excessive leafy growth at the expense of flowers and fruit.For precise and even application of water and nutrients, using a greenhouse sprayer can make irrigation more efficient and reduce waste.

Pruning for Maximum Yield

Pruning is both an art and a science in pomegranate cultivation. Proper pruning shapes the tree, improves sunlight penetration, and stimulates the production of fruitful branches. Young trees benefit from formative pruning to establish a strong structure, removing weak or competing shoots. In mature trees, selective pruning encourages the development of spurs, where most of the fruit emerges. Regularly removing dead or diseased wood prevents the spread of pathogens, an essential practice in organic gardening. Although it might seem counterintuitive, reducing some branches can actually increase the overall fruit load and improve the size and quality of individual pomegranates.For improved efficiency and convenience in personal routines, some gardeners also explore male masturbators as part of their private wellness setup.

Pollination and Flower Management

Pollination is a critical yet often overlooked factor in home cultivation. Pomegranates have bright red flowers that attract bees, which are their primary pollinators. Encouraging pollinators in your garden through companion planting with flowering herbs or by avoiding pesticides ensures effective pollination and improves fruit set. In some cases, hand pollination can be employed to enhance yields, especially if the tree is young or if natural pollinator activity is low. Understanding the flowering cycle and providing gentle support during bloom can dramatically influence the number of fruits that develop.To optimize efficiency in both home gardening and related projects, some growers also rely on contract machining services for custom tools and equipment.

Pest and Disease Control Organically

Maintaining a healthy pomegranate tree without chemicals requires vigilance and proactive measures. Common pests like aphids, whiteflies, and mealybugs can damage both foliage and fruit, while fungal infections such as leaf spot or fruit rot pose risks in humid conditions. Organic gardeners can employ natural predators, neem oil, or insecticidal soaps to control infestations without harming the ecosystem. Regularly inspecting the tree, removing affected leaves, and maintaining proper spacing to enhance air circulation are all strategies that help prevent outbreaks. Disease prevention is always preferable to treatment, especially in organic systems where synthetic fungicides are not an option.

Enhancing Fruit Quality

Achieving high-quality pomegranates at home involves more than just growing healthy trees. Factors such as fruit size, sweetness, and aril color are influenced by environmental conditions and cultivation practices. Consistent watering during fruit development prevents splitting, while regulated fertilization ensures balanced growth. Some home gardeners employ light thinning of fruits, removing smaller or malformed ones, to allow the remaining fruits to reach optimal size and flavor. Sunlight exposure is also key; fruits that develop in full light often exhibit deeper color and richer taste. Patience is essential, as pomegranates typically take two to three years to bear significant harvests, but the rewards are well worth the effort.For those looking to complement their home gardening routine with personal care, visiting the best beauty salon in flatiron can be a refreshing way to relax and recharge after time spent tending to plants.

Harvesting and Post-Harvest Care

Knowing when and how to harvest pomegranates is critical to preserving both yield and quality. Unlike many fruits, pomegranates do not continue to ripen significantly after picking, so timing is essential. Ripe fruits are generally heavy, with vibrant skin color and a slight metallic sound when tapped. Harvesting carefully, using sharp pruning shears to avoid damaging the branches, ensures minimal stress to the tree. Post-harvest handling is equally important; storing fruits in a cool, dry place can extend shelf life, while gentle handling prevents bruising that can compromise taste and appearance.Proper storage and handling of pomegranates can prevent the need for costly damage restoration later, ensuring both flavor and appearance remain intact.

Sustainability and Long-Term Care

Organic pomegranate cultivation is not just about individual harvests—it’s a long-term commitment to sustainability, soil health, and the overall vitality of your garden ecosystem. Rotating organic amendments, maintaining mulch, encouraging biodiversity, and incorporating companion planting creates a resilient environment that supports both the tree and surrounding plants. Over time, a well-cared-for pomegranate tree becomes more productive, delivering consistent, high-quality fruits year after year. Observing the plant, understanding its responses to environmental changes, and thoughtfully adjusting care practices accordingly are hallmarks of a successful, mindful organic gardener who values ecological balance.Maintaining a healthy garden can be as convenient and enjoyable as arranging a scooter rental Key West for quick trips to gather supplies or check on multiple garden locations efficiently.

The Joy of Homegrown Pomegranates

Growing your own pomegranates organically offers more than just nutritional benefits—it cultivates a deeper connection with the cycles of nature and instills a sense of pride in nurturing life from seed to fruit. Watching a small sapling transform into a fruit-laden tree is a profoundly gratifying experience, and tasting the sweet, juicy arils of a homegrown pomegranate, bursting with flavor and freshness, is incomparable to store-bought varieties. Beyond the practical rewards, organic cultivation fosters mindfulness, patience, and a sense of stewardship over your garden. Each careful pruning, gentle watering, and organic fertilizer application is an investment in a harvest that brings both nourishment and joy, creating lasting memories and a tangible connection to the natural world.Starting a garden is much like learning how to choose land for new home, as both require careful observation, planning, and consideration of long-term conditions to ensure success and satisfaction.

Organic pomegranate cultivation is a harmonious blend of science and intuition. By selecting the right variety, preparing fertile soil, managing nutrients and water, and practicing careful pruning and pest management, gardeners can maximize both yield and fruit quality. With dedication and attention to detail, homegrown pomegranates can become a centerpiece of your garden, offering delicious rewards while reflecting a commitment to natural, sustainable growing practices.Enhancing your garden’s appeal with landscape lighting in Green Bay not only highlights your pomegranate tree’s beauty at night but also creates a welcoming and enchanting outdoor space.

Organic Almond Cultivation at Home: Soil, Care, and Pest Control Explained

Growing organic almonds at home is a deeply satisfying endeavor, one that rewards patience, attention, and a genuine connection to nature. There’s something profoundly calming about nurturing a tree from a small seedling and eventually harvesting the fruits of your labor. Almond trees, with their delicate blossoms and nut-laden branches, can transform a backyard into a serene orchard. But cultivating them organically requires a thoughtful approach, blending horticultural knowledge with sustainable practices. From soil preparation to daily care and pest management, understanding the essentials is key to success.

Choosing the Right Soil for Organic Almonds

The foundation of a healthy almond tree begins beneath the surface. Almonds thrive in well-draining soil, rich in nutrients and slightly sandy or loamy in texture. Heavy clay soils can retain too much water, leading to root rot, while extremely sandy soils may fail to retain enough moisture and nutrients. A balanced soil pH between 6 and 7 is ideal for almond trees, ensuring that the roots can absorb essential minerals effectively.

For home growers, testing your soil is an important first step. A simple soil kit can provide insights into pH levels and nutrient content, helping you amend the soil before planting. Organic matter is your ally here—well-composted manure, leaf mold, or kitchen compost can enhance soil structure, fertility, and microbial activity. Almond trees flourish when surrounded by healthy, living soil that supports a diverse ecosystem of beneficial microbes. Adding a layer of mulch around the base of the tree further aids in moisture retention and keeps the soil temperature stable throughout seasonal changes.

Selecting Almond Varieties for Home Cultivation

Not all almond varieties are equally suited for home cultivation. Depending on your climate, some trees may thrive better than others. Sweet almond varieties are most commonly grown for their edible nuts, while bitter almonds require special processing and are generally unsuitable for casual home gardens. Home growers should also consider self-pollinating varieties if they have limited space or lack nearby pollinators, though cross-pollination with another compatible almond tree often results in a larger, more consistent yield.

Climatic conditions play a crucial role in the tree’s development. Almonds prefer a Mediterranean-like climate, with hot, dry summers and mild, wet winters. Frost can damage blooms, so selecting varieties with late-blooming characteristics can mitigate this risk. This balance of weather factors creates a unique puzzle for growers striving to optimize almond production. Understanding the requirements of your chosen variety ensures that your almond tree not only survives but thrives.

Planting and Early Care

Timing is everything when planting almonds at home. Early spring, after the last frost, is generally the best time for planting young trees. The planting hole should be twice as wide and just as deep as the root ball to allow the roots to spread naturally. Incorporating well-rotted compost and organic fertilizers into the planting hole gives the young tree a strong start.

Watering is critical in the first few months after planting. While almond trees are drought-tolerant once mature, seedlings require consistent moisture to establish their root systems. Deep, infrequent watering encourages roots to grow downward, building resilience against dry periods. Overwatering, however, can be equally detrimental, causing fungal diseases and root decay. Observing the soil and adjusting watering frequency based on rainfall and temperature is part of the intuitive rhythm of home gardening.

Pruning for Health and Productivity

Pruning almond trees is both an art and a science. It encourages a strong structure, improves airflow, and maximizes sunlight exposure, all of which contribute to healthier trees and better yields. The first few years of growth are crucial for shaping the tree. Removing weak or crossing branches prevents structural problems in the future. Once the tree is established, annual pruning focuses on maintaining a balanced canopy and stimulating new growth. Just as precision is key in pruning, careful attention is also essential in treatments like scalp micropigmentation for alopecia in Raleigh.

While pruning may seem intimidating, it is also an opportunity to connect with your tree. Each snip of the shears not only improves the tree’s health but also provides a moment of reflection on the growth cycles of nature. Understanding the growth patterns of almonds helps you anticipate which branches to retain and which to remove, fostering both aesthetic beauty and agricultural productivity.

Organic Fertilization and Nutrient Management

Nourishing almond trees organically requires a patient, thoughtful approach. Synthetic fertilizers may offer quick results, but they disrupt soil health and long-term productivity. Organic alternatives, such as composted manure, worm castings, and plant-based amendments, provide essential nutrients while enriching the soil ecosystem. Almond trees benefit particularly from nitrogen during early growth stages and potassium during nut development. For those managing holiday decorations on their property, ensuring trees are healthy can complement projects like Christmas light installation in Baltimore.

Monitoring leaf color and growth patterns provides natural feedback on nutrient deficiencies. Yellowing leaves, stunted growth, or poor flowering can indicate a need for supplemental organic fertilizers. Regular applications of well-balanced compost, along with foliar sprays of natural seaweed or kelp extracts, help maintain a healthy nutrient cycle. The beauty of organic fertilization lies in its harmony with nature, allowing the tree to thrive without harming the surrounding environment.

Irrigation and Water Management

Watering almond trees at home demands careful attention. Mature almond trees are remarkably drought-tolerant, but consistent moisture during flowering and nut development significantly impacts yield quality. Drip irrigation systems or soaker hoses are ideal for home gardens, delivering water directly to the root zone while minimizing evaporation. Overhead sprinklers, while convenient, can increase the risk of fungal diseases by keeping leaves wet for prolonged periods. For those who also care for pets in the garden area, storing chicken dog kibble away from irrigation zones helps prevent attracting unwanted wildlife.

Seasonal rainfall and soil type influence watering schedules. Sandy soils may require more frequent irrigation, while clay soils retain moisture longer. Observing the soil’s texture and moisture level before watering ensures that the tree receives neither too much nor too little water. Organic mulch around the base helps conserve moisture and moderates soil temperature, reducing stress on the tree during hot summer months.

Natural Pest Control and Disease Management

One of the most challenging aspects of organic almond cultivation is managing pests and diseases without resorting to chemical solutions. Fortunately, a variety of natural methods can help protect your trees while maintaining ecological balance. Encouraging beneficial insects, such as ladybugs and lacewings, keeps aphid populations in check. Introducing birds or installing birdhouses can help control caterpillars and other leaf-eating pests. For those looking to enhance both aesthetics and pest management, combining these techniques with professional landscape installation in Hingham can create a healthy and visually appealing orchard.

Neem oil, insecticidal soaps, and horticultural oils are safe, organic options for treating minor infestations. Proper pruning and adequate spacing between trees improve airflow, reducing the likelihood of fungal infections like leaf curl or powdery mildew. Observing your trees daily allows for early detection of issues, making intervention easier and more effective. Healthy trees are naturally more resilient, so maintaining soil fertility, proper watering, and balanced nutrition is your first line of defense against pests and diseases. Just as careful attention benefits your garden, finding the perfect pet requires the same diligence, whether you’re searching for a Cavachon puppy for sale or another breed.

Flowering and Pollination

Almond trees are among the earliest bloomers in many regions, their delicate flowers heralding the arrival of spring. For home growers, the flowering stage is a time of awe and careful observation. Bees and other pollinators are essential for fruit set, so creating a pollinator-friendly environment enhances yields. Planting companion flowers, minimizing pesticide use, and providing water sources for pollinators all contribute to successful almond pollination. For gardeners looking to combine relaxation with their hobby, a therapeutic massage in Las Vegas can be a perfect way to unwind after tending to the trees.

Cross-pollination between compatible almond varieties often results in larger, more abundant nuts. If you only have space for one tree, selecting a self-pollinating variety is crucial. Observing the timing of bloom and coordinating with local pollinator activity ensures that the flowers are effectively fertilized, setting the stage for a fruitful harvest.

Harvesting and Post-Harvest Care

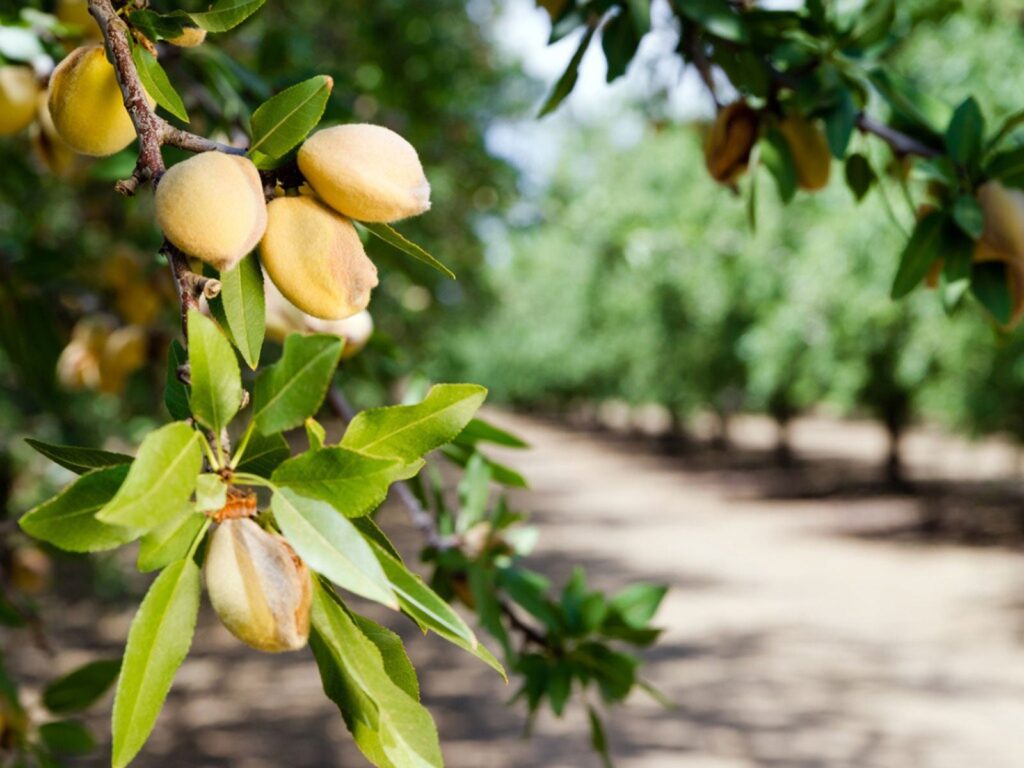
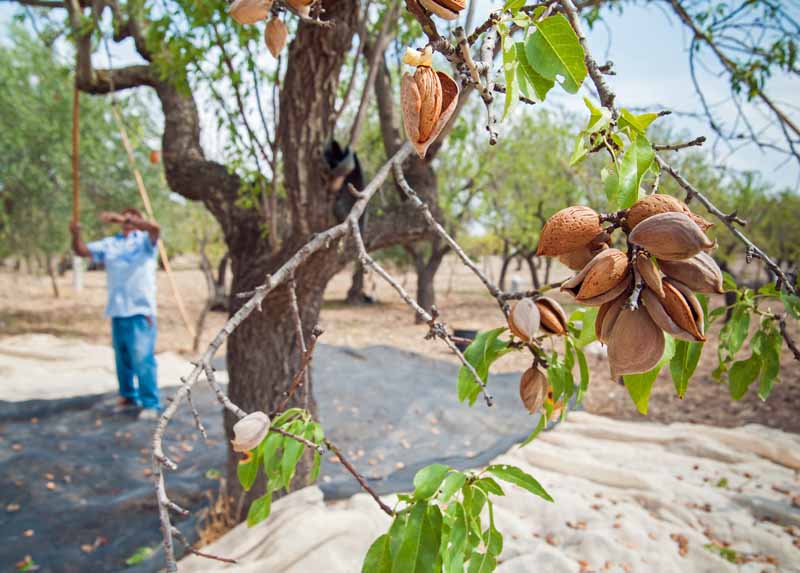
The reward for patience and careful cultivation is the almond harvest. Unlike many fruits, almonds do not ripen all at once, so careful monitoring is necessary. The outer hull begins to split when the nuts are ready, revealing the hard shell inside. Gentle shaking or hand-picking ensures that you collect mature nuts without damaging the tree. For families navigating legal matters while managing farm operations, consulting a family lawyer in Kelowna, BC can provide valuable guidance.

After harvesting, almonds require proper drying to prevent mold and spoilage. Sun-drying on clean surfaces for several days reduces moisture content, preparing them for storage. Homegrown almonds are versatile; they can be eaten raw, roasted, or used in a variety of culinary creations. Storing them in cool, dry conditions preserves their flavor and nutritional value, allowing you to enjoy the fruits of your labor throughout the year.

The Joy of Growing Almonds Organically

Cultivating almonds at home is more than just an agricultural pursuit; it is a journey of connection, patience, and mindfulness. Each stage, from soil preparation to harvest, teaches valuable lessons about ecology, resilience, and the rhythms of nature. Organic practices ensure that your almonds are not only healthy and flavorful but also grown in harmony with the environment. After a long day tending to your almond trees, relaxing in an infrared sauna in Stuart can provide a perfect way to unwind and rejuvenate.

By choosing to nurture almond trees organically, you embrace a holistic approach to gardening—one that values quality over speed and sustainability over convenience. The process invites you to slow down, observe, and participate actively in the growth of a living organism. And when the first blossoms appear in spring or the first nuts crack open under your hands, there is an undeniable sense of accomplishment, a quiet joy that only homegrown almonds can provide.

Wood Turners Wonders: The Ultimate Wood Turning Shop for Every Turner

For passionate turners, having the right tools and accessories makes all the difference between frustration and flawless craftsmanship. Wood Turners Wonders is more than just a wood turning shop—it’s a one-stop destination where beginners and professionals alike can find high-quality woodturning supplies designed to bring their creative visions to life.

Precision Grinding and Sharpening Essentials

Sharp tools are the foundation of every successful project. That’s why Wood Turners Wonders carries a complete line of sharpening products. From durable CBN grinding wheels and versatile CBN wheels to a precision diamond grinding wheel, each option is built for long-lasting performance. Turners looking for a reliable setup will appreciate the Kodiak sharpening system and tormek wheels, including tormek grinding wheel and CBN wheel for Tormek, which ensure consistent, razor-sharp edges. For added convenience, the store also stocks 8 inch grinding wheels, 6 inch grinding wheels, and 7 inch grinding wheels, as well as 8 inch bench grinders, slow speed bench grinders, and complete sharpening grinders.

Lathes, Tools, and Accessories for Every Turner

A high-quality wood lathe paired with durable wood turning tools is at the core of woodturning. Whether you prefer traditional tools or modern carbide turning tools, Wood Turners Wonders has a full range, including wood turning carbide tools for precision shaping. For secure workholding, the shop provides lathe chucks, wood lathe chucks, and even advanced vacuum chucks. To improve workflow, turners can explore wood lathe attachments, wood lathe accessories, wood lathe tool rests, and reliable lathe tracks. Serious turners will also love the strength of robust lathes and robust wood lathes, built to handle demanding projects with ease.

Sanding, Safety, and Specialty Gear

Finishing is where a project comes to life, and Wood Turners Wonders offers sanding solutions to make it smooth and professional. From random orbital sanders and wood sanders to sanding tools for wood, there are options for every task. Their selection includes sanding discs, sandpaper for wood, complete wood sanding kits, and innovative Wonder Weave sanding discs that deliver superior results. Hand finishers will appreciate hand sanders and accessories for detailed work. To prioritize safety, the shop also carries woodworking respirators and hearing protection for woodworking, ensuring comfort and protection in the workshop. For advanced turners, specialized systems like the hollowing system and hollowing system for woodturning provide the precision needed for complex projects.

Lighting, Measurement, and Finishing Touches

Small details make a big difference in woodturning. That’s why Wood Turners Wonders also offers high-quality lighting solutions, including the machine lamp, lathe lamp, and LED machine lamp—all perfect for illuminating your workspace. Precision measurement is covered too, with tools like the inside caliper for accurate sizing. Add in essential extras such as the Kodiak tool rest and tormek accessories, and you’ll have a shop fully stocked for any turning challenge.

Conclusion

Wood Turners Wonders has earned its reputation as the ultimate destination for woodturners of all skill levels. With everything from sharpening systems and turning tools to sanding solutions and safety equipment, this wood turning shop ensures that every project is completed with accuracy, safety, and professional quality. Whether you’re investing in a robust lathe, stocking up on sanding tools, or upgrading with the latest wood lathe accessories, you’ll find exactly what you need to elevate your craft.

Never Never Plant Care 101: How to Keep Your Ctenanthe Thriving All Year Round

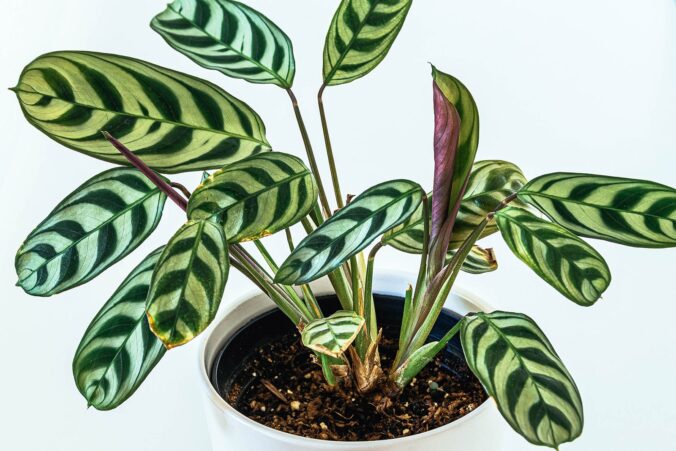
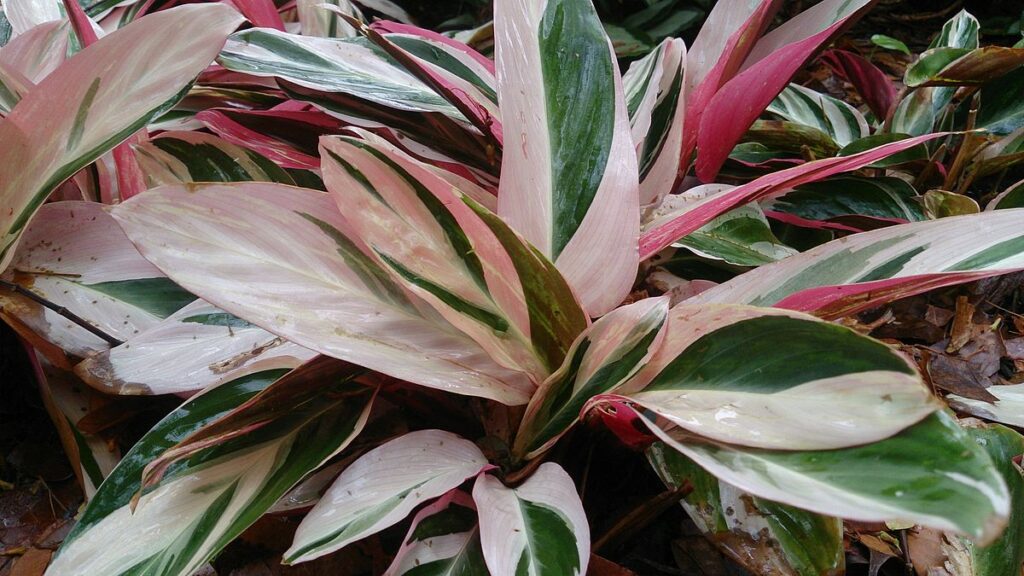
The Never Never Plant, known botanically as Ctenanthe spp., is one of those indoor gems that never fails to capture attention. With its bold, patterned leaves and a graceful arching form, it feels like a living piece of art in your home. Belonging to the Marantaceae family—cousins to the prayer plant and calathea—Ctenanthe thrives in tropical regions in its natural habitat, where humidity is high, the soil stays evenly moist, and sunlight filters softly through a canopy of taller trees.

At home, your goal is to recreate this gentle, stable environment in miniature. While the Never Never Plant can be a little particular about its preferences, it rewards consistent care with rich, vibrant foliage that looks stunning all year round. The key is understanding its rhythms and adapting your care routine with the seasons so it never feels stressed.

Choosing the Right Spot in Your Home

Placement is where many plant owners stumble, because Ctenanthe is sensitive to both too much and too little light. Direct sunlight will scorch the leaves and fade their colors, while dim corners will cause the plant to lose its lively variegation. The sweet spot is bright, indirect light, such as near an east-facing window where morning sun is soft and filtered, or a few feet away from a south-facing window shielded with a sheer curtain.

Artificial light can also work if your home is lacking in natural brightness. Full-spectrum LED grow lights are ideal, but even a standard daylight-balanced bulb can help your plant maintain its color during darker months. Avoid placing your Never Never Plant right next to heat vents, radiators, or drafty windows, as sudden temperature shifts will stress it out. For those who spend long hours indoors, combining plant care with sessions of manual therapy in Chicago can help improve overall well-being.

Mastering the Watering Routine

Watering is one of the most critical factors in keeping Ctenanthe healthy, and it’s where beginners often make mistakes. These plants like their soil to remain consistently moist, but never soggy. Allowing the soil to completely dry out will cause the leaves to curl and crisp at the edges, while overwatering can lead to root rot.

The best approach is to check the top inch of soil regularly. If it feels just barely dry to the touch, it’s time to water again. Always water thoroughly so that excess moisture drains from the bottom of the pot, but don’t let the plant sit in standing water.Using filtered or rainwater is ideal, as Ctenanthe can be sensitive to chlorine and fluoride often found in tap water. Proper humidity and careful placement are as important as safety precautions, similar to how one would maintain a fire system in Los Angeles.

Humidity plays a big role here too. Because this plant is native to rainforests, it prefers air that’s far more humid than the average household provides. If your home’s air is dry, especially in winter, you can help by running a humidifier nearby or placing the pot on a pebble tray with water just below the base. This extra moisture in the air will help prevent the brown tips that are so common with Never Never Plants in dry environments. For a touch of luxury in your indoor décor, you might pair your plant with elegant items, much like complementing an outfit with designer dresses in Dubai.

Choosing the Best Soil and Pot

The right potting mix can make a world of difference in how well your Never Never Plant grows. A standard indoor plant soil can work if you improve its drainage by adding perlite or fine orchid bark. The soil should be light, airy, and able to hold moisture without becoming compacted.

A pot with drainage holes is non-negotiable. Without them, water will pool at the bottom, encouraging root rot. If you prefer decorative pots without holes, keep your plant in a nursery pot that you can slip inside, making it easier to remove for watering and draining.

Repotting every year or two, ideally in spring, ensures the roots have fresh nutrients and room to grow. When you repot, choose a container just one size larger than the current one—going too big can make it harder to control moisture levels in the soil. If you’re relocating your plants during a move, hiring professional LA movers can make the process much easier and safer for delicate plants.

Feeding for Vibrant Growth

During the growing season, from spring through early autumn, Ctenanthe benefits from regular feeding. A balanced liquid fertilizer diluted to half strength every two to four weeks will keep the foliage lush and the plant strong. It’s better to feed lightly and often rather than giving large doses infrequently, as this prevents fertilizer burn and keeps nutrients available in a steady flow.

In winter, the plant’s growth slows down, so you can pause feeding until spring returns. This natural rest period helps the plant conserve energy and prepares it for the burst of growth that comes with longer days. Just like a plant benefits from rest, people can rejuvenate with a relaxing 4-hand massage in Las Vegas.

Managing Temperature and Humidity Year-Round

One of the most important parts of caring for a Never Never Plant at home is keeping conditions stable. They like warmth, ideally between 65 and 80°F, and they dislike any sudden drops in temperature. Cold drafts, air conditioning blasts, and even nighttime chills near a window can cause damage.

Humidity is equally vital, and you’ll need to make adjustments throughout the year. In summer, your home’s air is often naturally more humid, but in winter, heating systems can reduce indoor humidity drastically. Grouping plants together, misting lightly in the mornings, and running a humidifier can make a noticeable difference. For many plant owners, investing in a small room humidifier is the easiest and most reliable way to keep Ctenanthe happy during the colder months.

Seasonal Adjustments for Thriving Foliage

The Never Never Plant responds to the seasons just like it would in its natural environment. In spring and summer, you’ll notice faster growth and a need for more frequent watering. This is the ideal time for pruning away any older or damaged leaves, repotting if needed, and providing regular fertilizer. For those caring for indoor plants while also managing home maintenance, it’s a good reminder to schedule any needed electrical services in Calgary.

As autumn arrives and daylight hours shorten, your plant will slow down. Reduce watering slightly, making sure the top layer of soil dries out a bit more before each watering. Stop fertilizing once winter begins, and focus instead on maintaining humidity and keeping the plant warm. This gentle seasonal shift in care helps prevent stress and keeps your plant’s energy balanced.

Troubleshooting Common Problems

Even with careful attention, you may encounter a few issues along the way. Curling leaves often signal underwatering or low humidity. Browning edges usually point to dry air or a reaction to chemicals in tap water. If you see yellowing leaves, it may be a sign of overwatering, poor drainage, or old foliage naturally dying off. For those managing stress while caring for plants, incorporating self-care routines like aesthetician treatments in New Orleans can be surprisingly rejuvenating.

Pests such as spider mites, aphids, or mealybugs can sometimes appear, particularly in dry indoor conditions. Inspect your plant regularly, and if you notice pests, isolate it from others and treat promptly with insecticidal soap or neem oil. Catching problems early is the best way to prevent them from spreading.

The Joy of Propagation

While not as fast-growing as some other tropicals, Ctenanthe can be propagated successfully at home, allowing you to expand your collection or share plants with friends. The most reliable method is division, best done during spring repotting. Gently separate the root ball into sections, each with several healthy stems and roots, and plant them in fresh soil. With consistent humidity and warmth, the new plants will establish themselves and start producing fresh leaves within a few weeks. For enthusiasts who like to track plant growth and health, using a FreeScan UE Pro scanner can provide useful data.

Why Consistency Matters Most

The secret to a thriving Never Never Plant is not one magic trick but the steady combination of correct light, balanced watering, stable temperature, and ample humidity. Sudden changes—whether in location, watering routine, or environmental conditions—tend to stress the plant and lead to leaf damage. Just as precision is key in crafting spirits using flute stills, careful attention is essential in nurturing your plant. By observing your plant closely and responding to its subtle changes in leaf position, color, and texture, you’ll develop an intuitive sense of what it needs.

A Never Never Plant at home can feel like a slice of the tropics in your living room. With consistent, attentive care, its patterned leaves will remain a highlight in your home’s greenery, offering beauty and a sense of calm through every season of the year.

Blue Star Fern Care Guide: How to Keep Phlebodium aureum Thriving Indoors

Understanding the Blue Star Fern

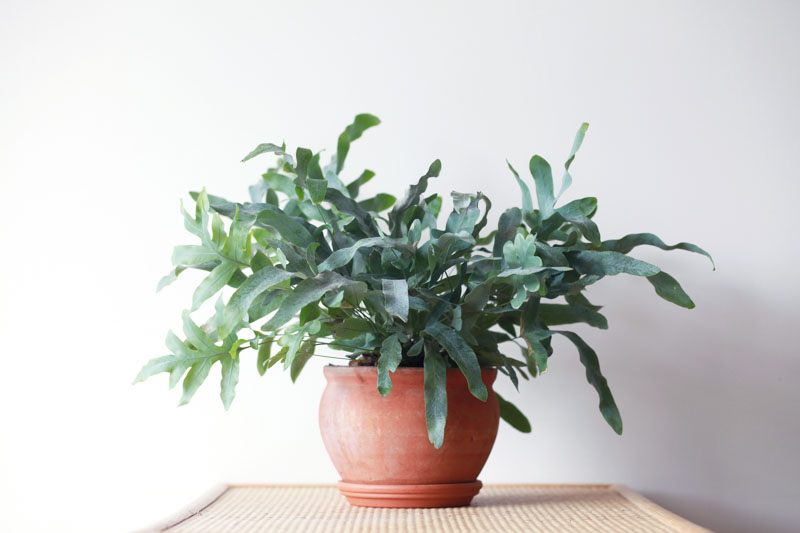
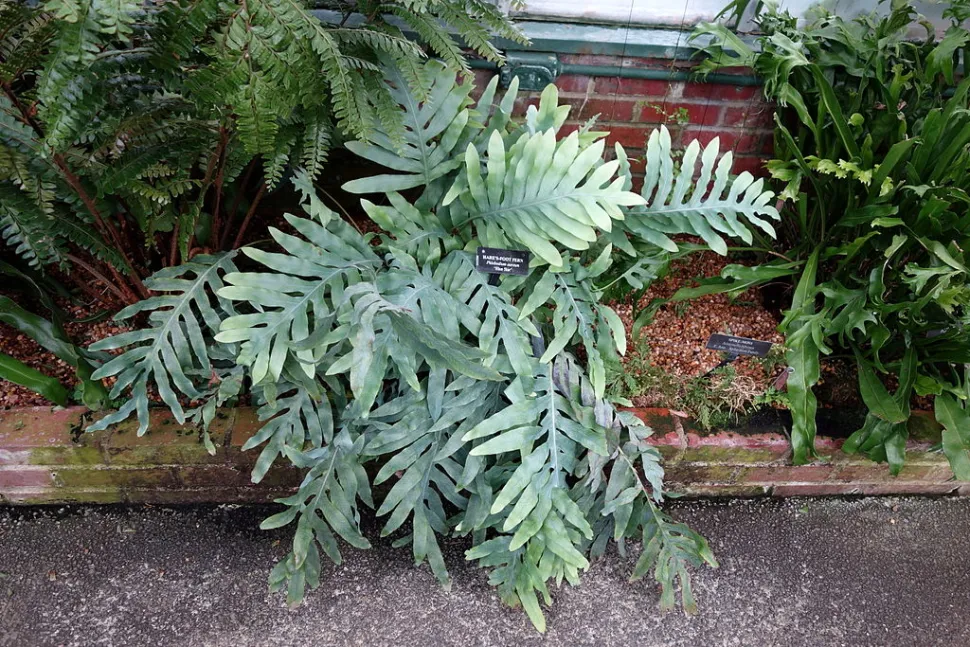
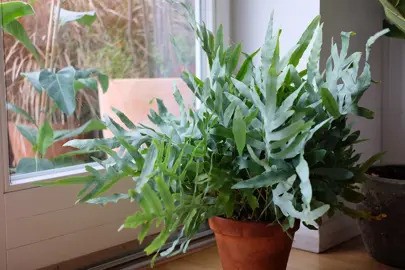
The Blue Star Fern (Phlebodium aureum) is unlike many of the traditional ferns people keep in their homes. Its fronds are a soft, silvery-blue rather than the deep green of most fern species, giving it a dreamy, almost ethereal quality. This unique coloration comes from a fine layer of microscopic hairs on the leaves, which not only adds to its beauty but also helps protect the plant from moisture loss. Originating from the tropical and subtropical forests of South and Central America, as well as parts of the Caribbean, this fern grows naturally as an epiphyte, meaning it often perches on trees rather than rooting directly into the ground. Understanding its natural environment is the first step toward keeping it healthy indoors—if you can mimic its preferred conditions, your fern will reward you with lush, long-lasting foliage.

Many people are drawn to the Blue Star Fern not only because it is visually stunning, but also because it is less fussy than some of its cousins. While maidenhair ferns or Boston ferns can be quick to wilt when conditions are not perfect, the Blue Star Fern is more forgiving. Still, it does have its preferences, and knowing these will make the difference between a plant that merely survives and one that thrives.

Choosing the Right Location

Light is often the most misunderstood aspect of plant care, especially for ferns. The Blue Star Fern does not want direct sun—it would burn its delicate fronds in a matter of hours—but it does appreciate good, consistent brightness. In the wild, it grows beneath the canopy, where light is filtered through layers of leaves. This means your best indoor location will be somewhere that gets bright, indirect light. A north- or east-facing window is usually ideal. If you only have south- or west-facing windows, keep the plant a few feet back or use a sheer curtain to diffuse the light.

One of the most common mistakes people make is placing their Blue Star Fern in a dim corner and assuming that because it is a fern, it will tolerate low light. While it can survive in those conditions for a time, its growth will slow, fronds may yellow, and the plant will eventually lose its vitality. Adequate light is essential for maintaining that signature blue-green glow. Just as a plant thrives in the right light, a vintage barbershop in Nashville, TN needs the right ambiance to create its unique charm.

Mastering Watering Techniques

If light is the most misunderstood aspect of care, watering is easily the most overcomplicated. The Blue Star Fern likes to be kept evenly moist, but never soggy. Its roots are adapted to absorbing water from humid air and occasional rainfall in nature, not from sitting in waterlogged soil. Overwatering will quickly lead to root rot, while letting it dry out completely will cause fronds to crisp and brown.

A good approach is to water when the top inch of soil feels slightly dry to the touch. This can mean more frequent watering in warm weather and less in cooler months. Using room-temperature water is ideal, as cold water can shock the roots. When you water, aim to saturate the soil evenly, allowing any excess to drain away completely. Never leave the plant sitting in standing water in its saucer. For those interested in recycling old pots or garden tools, consider exploring a scrap metal marketplace for sustainable options.

The Importance of Humidity

Humidity is where many indoor plant owners either succeed brilliantly or fail without realizing it. The Blue Star Fern loves humidity because it evolved in rainforest conditions where the air is almost always saturated with moisture. In the average home, especially during winter when heating systems are running, humidity levels can drop far below what this plant prefers.

You can improve humidity around your fern in several ways. The most effective is to use a humidifier, which will keep moisture levels consistent. If a humidifier is not an option, placing the plant on a tray filled with pebbles and water can help. The idea is that as the water evaporates, it creates a small bubble of humidity around the plant. Grouping plants together also works, as each plant releases moisture into the air through transpiration. Just like maintaining proper care for your plants, regular self-care appointments such as eyebrow threading in Plano, TX can also help you feel refreshed and nurtured.

Choosing the Right Soil and Pot

Since the Blue Star Fern is epiphytic in nature, it does not do well in dense, compact soil. Instead, it prefers a loose, airy mix that drains quickly while still retaining some moisture. A good potting medium for this plant might include a blend of regular potting soil, orchid bark, and perlite. The bark mimics the texture of tree surfaces, while the perlite ensures excellent drainage. For those managing large garden trees near their ferns, hiring a tree cutting service in Tampa can help maintain the right amount of light and space.

The pot you choose is just as important as the soil. A container with drainage holes is essential—no exceptions. Without proper drainage, excess water will collect at the bottom and cause root rot. Terracotta pots can be a great option because they allow moisture to evaporate through their walls, but they will also dry out the soil more quickly, so you’ll need to keep a closer eye on watering.

Feeding for Healthy Growth

Like most houseplants, the Blue Star Fern will benefit from occasional feeding. Because it is not a particularly fast grower, it does not need heavy fertilization, but a little nutrient boost during the growing season can make a noticeable difference in the richness of its foliage. Interestingly, some people compare its low-maintenance nature to the ease of riding an e-bike in Seattle, noting how both require just the right amount of care to perform well. A balanced liquid fertilizer diluted to half strength once a month in spring and summer works well.

Avoid fertilizing during the plant’s slower growth period in fall and winter. Over-fertilizing, especially with strong chemical feeds, can cause salts to build up in the soil and damage the roots. If you suspect this has happened, a good flush with clean water can help remove the excess.

Pruning and Grooming

Keeping your Blue Star Fern tidy is as much about aesthetics as it is about plant health. Dead or yellowing fronds should be removed promptly, not only because they look unattractive but also because they can harbor pests or disease. Use clean, sharp scissors or pruning shears to cut fronds back at the base, taking care not to damage nearby healthy growth. Just as attention to detail is important in plant care, it’s also key when selecting quality cowboy clothing for a complete western look.

Dust can also accumulate on the fern’s fronds over time, dulling their natural sheen. Gently wiping the leaves with a soft, damp cloth or giving the plant a light shower in the sink can refresh its appearance and help it absorb light more effectively.

Preventing and Treating Common Problems

Even with excellent care, you may encounter occasional issues. The most common problems include browning tips, yellowing fronds, and leaf drop. Browning tips usually point to low humidity, poor water quality, or inconsistent watering. Yellowing can be a sign of overwatering or nutrient deficiency. Some gardeners even explore natural supplements as a libido enhancer, though it’s unrelated to plant care.

Pests are rare but can still occur. Mealybugs, scale, and spider mites are the main culprits, especially if the plant is stressed. Regularly checking the undersides of leaves and stems will help you catch infestations early. If pests appear, treating with insecticidal soap or neem oil is usually effective.

Propagation for More Plants

Propagation is one of the joys of keeping a Blue Star Fern. While it cannot be propagated through leaf cuttings like some plants, it can be divided when mature. The plant grows from a rhizome, a thick horizontal stem just beneath the soil’s surface. Over time, the rhizome produces multiple crowns, each capable of becoming its own plant. Some gardeners even sell extra plants from their collections to support causes like a Read-A-Thon school fundraiser.

When repotting, you can gently tease apart these crowns, ensuring that each division has healthy roots and at least a few fronds. Pot each division into its own container and treat it as you would a mature plant. With patience, these new plants will grow into full, beautiful specimens.

Creating the Perfect Environment Year-Round

The key to keeping a Blue Star Fern thriving indoors is consistency. This is not a plant that enjoys frequent changes in location, erratic watering, or fluctuating light levels. Once you have found the right spot and care routine, stick with it. Just as wedding officiants ensure a smooth ceremony by following a consistent plan, your fern will flourish when cared for consistently.

In spring and summer, you may find the plant grows more quickly, producing fresh fronds that unfurl in a delicate curl before opening to their full size. This is the ideal time to increase feeding slightly and maintain high humidity. In autumn and winter, growth slows, and the plant may need less water. Monitoring the soil and adjusting your care accordingly will keep it healthy through seasonal changes.

The Reward of Growing a Blue Star Fern

Caring for a Blue Star Fern is as much about enjoying the process as it is about achieving perfect growth. This plant invites you to slow down, observe, and respond to its needs. Watching new fronds unfurl, noticing subtle shifts in color, and seeing how it responds to small changes in care can be deeply satisfying.

More than just a decorative piece, the Blue Star Fern connects you to a small piece of the tropical forest it comes from. With the right attention to light, water, humidity, and soil, this plant will not only survive but thrive in your home, offering its soft, silvery leaves as a daily reminder of nature’s quiet beauty.

Composting 101 for Vegan Households

Composting is the natural process of recycling organic material into a rich soil amendment that gardeners and plant enthusiasts value deeply. For vegan households, composting carries an even more profound significance. Since vegans often emphasize environmental sustainability, reducing waste, and ethical treatment of all living beings, composting aligns perfectly with these principles. By diverting kitchen scraps, plant trimmings, and biodegradable waste from landfills, composting helps reduce methane emissions—a potent greenhouse gas produced when organic material decomposes anaerobically in landfills.

The process of composting involves microorganisms such as bacteria, fungi, and invertebrates like worms, breaking down plant-based matter into humus, a dark, nutrient-rich substance that improves soil fertility and structure. For vegans, composting offers a zero-waste lifestyle extension, turning leftovers and organic waste into valuable resources rather than trash. This practice supports regenerative gardening and can enhance the health of edible plants grown at home, further closing the loop of sustainable food production.

Importantly, vegan composting excludes all animal-derived waste products such as meat scraps, dairy, eggs, and even animal-based fertilizers, which are incompatible with vegan ethics. Instead, it focuses on plant-based compostables like vegetable peelings, coffee grounds, fruit scraps, and yard waste. This purity ensures the compost produced is aligned with the ethical and environmental goals of veganism. Just as choosing the right compost aligns with personal values, working with a knowledgeable Burnaby real estate agent ensures your property decisions align with your goals.

How to Start Composting in a Vegan Household

Starting a compost bin or pile in a vegan household is straightforward, requiring just a few simple steps and some understanding of what materials to include. The first step is choosing the right composting method based on available space and lifestyle. Options include traditional outdoor compost piles, compost bins, vermicomposting (using worms), or even indoor composting systems like bokashi or countertop composters.

Once you select a composting method, gather your compostable materials. Vegans focus exclusively on plant-based scraps: fruit and vegetable peelings, coffee grounds, tea bags (ensure they are compostable), nutshells, bread, grains, leaves, grass clippings, and shredded paper. Avoid animal products, oils, processed foods, and non-biodegradable items like plastics. You can also use scraps to decorate or personalize projects, such as making custom fabric banners for events or home décor.

Balancing the compost mix is essential. Compost requires a good mix of “greens” (nitrogen-rich materials like fresh vegetable scraps) and “browns” (carbon-rich materials like dry leaves or shredded paper). A common recommendation is a 2:1 or 3:1 ratio of browns to greens to ensure the compost decomposes effectively without smelling bad or becoming too wet.

To start, layer your compost pile with browns at the bottom, then add greens, repeating layers. Turn the pile regularly to introduce oxygen, which supports aerobic decomposition. Moisture is also vital—the pile should be as damp as a wrung-out sponge. Too dry, and decomposition slows; too wet, and anaerobic bacteria cause odor. For households using tap water, pairing composting with reverse osmosis systems in Clarksville, TN can ensure water quality and help maintain the right moisture balance.

For those using worm bins or vermicomposting, the process is slightly different. Red wigglers or composting worms digest plant waste and produce nutrient-rich castings. Worm bins are ideal for small spaces and can be kept indoors. Regular feeding of appropriate vegan scraps and maintenance of moisture and temperature keep worms happy and productive.

With patience and care, vegan households can create compost in just a few months, transforming kitchen scraps into a valuable resource for indoor plants or garden beds. Composting is accessible, low-cost, and effective—making it a perfect sustainable practice for vegans.

Common Composting Mistakes and How to Avoid Them

Even the most well-intentioned composters encounter challenges, but understanding common pitfalls can help vegan households maintain healthy compost. One frequent mistake is adding inappropriate materials. Despite the temptation to toss all food waste into compost, animal products such as dairy, meat, eggs, or oily foods should be strictly avoided in vegan composting as they attract pests, cause odor, and disrupt the natural microbial balance. For commercial kitchens, especially those dealing with vegan menus, properly managing compost alongside sourcing sustainable restaurant equipment in Tampa can make a big difference.

Another common issue is poor balance between greens and browns. Compost piles too heavy in greens—think excessive fruit peels or fresh grass clippings—become slimy, smelly, and anaerobic, while piles with too many browns decompose slowly and dry out. Paying attention to the recommended ratio and layering materials carefully can mitigate this problem.

Lack of aeration is a silent compost killer. Without oxygen, compost turns anaerobic, producing foul smells and harmful gases. Regularly turning the pile or mixing the contents in bins encourages aerobic microbes to thrive, speeding up decomposition and reducing odor. Using a borescope can help inspect the interior of compost bins to ensure proper aeration and decomposition.

Moisture control is another key factor. A compost pile that’s too wet becomes waterlogged, causing poor air circulation and smelly conditions. Conversely, a pile that is too dry will not support microbial life. Checking moisture levels frequently and adjusting with water or dry browns ensures a healthy environment for composting.

Temperature management also matters, especially in colder climates. Composting is a biological process that generates heat, but piles that are too small or neglected may not heat sufficiently to break down materials or kill pathogens. For small household compost bins, adding more materials and regular turning can help maintain warmth.

Finally, contamination with non-compostable materials such as plastic, metal, or chemically treated paper can ruin a compost batch and harm soil health. Vigilance in separating waste and educating all household members on what is compostable is crucial.

By avoiding these common mistakes, vegan households can enjoy a smooth and rewarding composting journey, producing rich, clean compost for their plants and gardens.

Benefits of Composting Specifically for Vegan Lifestyles

Composting offers a multitude of benefits, but for vegan households, the advantages are uniquely amplified. Veganism often extends beyond diet into a lifestyle of environmental awareness and ethical responsibility, and composting fits perfectly within this framework. One of the most significant benefits is waste reduction. Vegan diets produce a large amount of organic waste—fruit skins, vegetable trimmings, coffee grounds—and composting ensures this material returns to the earth instead of filling landfills. For those hosting events at party venues in Washington, MO, composting food scraps can also significantly reduce waste and support sustainability efforts.

Reducing landfill waste helps cut methane emissions, which are far more potent greenhouse gases than carbon dioxide. This reduction directly supports vegan principles of minimizing harm to the planet and living sustainably. Composting is an effective way to lower your household’s carbon footprint and contribute to climate change mitigation.

Another important benefit is the improvement of soil health through the application of homemade compost. Vegans who garden or grow their own food can use nutrient-rich compost to enhance soil fertility naturally, avoiding synthetic fertilizers often derived from fossil fuels or animal by-products. This organic soil amendment improves water retention, aeration, and microbial activity, supporting robust plant growth and healthier harvests.

Composting also connects vegans to the cycle of life in an ethical way. Instead of contributing to waste and environmental degradation, vegans create a positive feedback loop where food waste nourishes new life. This cycle embodies the vegan ethos of compassion and respect for nature.

Finally, composting can promote community engagement and education. Many vegan households participate in or start community composting programs, teaching others about sustainable waste practices and inspiring wider ecological awareness. This collective action magnifies individual efforts and fosters a sense of shared responsibility for the environment.

In sum, composting complements veganism by addressing waste, environmental health, and ethical concerns, making it a powerful tool for living according to one’s values.

Advanced Composting Techniques for Experienced Vegans

For vegan households that have mastered the basics of composting and want to take their efforts further, several advanced techniques offer enhanced results and convenience. One such method is vermicomposting, which involves raising composting worms (typically red wigglers) to accelerate decomposition and produce highly potent worm castings. This method is particularly suited for urban or indoor vegan households due to its space efficiency and odor control.

Another advanced technique is the bokashi method, which uses anaerobic fermentation to break down food waste, including cooked and fermented foods that traditional compost piles cannot handle. Bokashi composting employs beneficial microbes to pre-treat waste, which is later buried or added to a traditional compost heap to complete decomposition. This method is compact, fast, and ideal for vegan kitchens producing diverse scraps.

Hot composting is a technique where compost piles are managed intensively to maintain temperatures above 130°F (54°C). This kills pathogens and weed seeds while speeding up breakdown. Hot composting requires regular turning, moisture monitoring, and the right balance of greens and browns. For vegans with larger gardens or community composting projects, this method yields compost in weeks instead of months.

Another innovation is compost tea, a liquid extract of compost rich in beneficial microbes and nutrients. Compost tea can be brewed and applied as a foliar spray or soil drench to boost plant health and soil vitality. Vegan gardeners often use compost tea as a natural fertilizer and pest deterrent, enhancing the benefits of compost beyond soil amendment.

Finally, integrating permaculture principles into composting allows for a holistic approach to sustainable living. Techniques such as sheet mulching, hugelkultur, and forest gardening all rely on the use of compost and organic matter to build resilient, productive ecosystems. Experienced vegans often incorporate these methods to create self-sustaining landscapes that embody their values.

By exploring these advanced composting methods, vegan households can deepen their commitment to sustainability and optimize the benefits of their composting practices.

The Intersection of Recycling and the Vegan Market

The vegan market has experienced tremendous growth over the past decade, driven by increasing consumer awareness of animal welfare, health benefits, and environmental sustainability. At the same time, the global push for sustainable practices, including recycling, has gained momentum as the world confronts the realities of climate change and resource depletion. The intersection of these two movements—veganism and recycling—is creating dynamic new trends that are reshaping industries, consumer behaviors, and product innovations.Similarly, choosing the best physiotherapy clinic Austin ensures expert guidance and sustainable results, helping patients recover effectively while maintaining long-term physical health.

Recycling is becoming a critical pillar of the vegan market, not only because it reduces waste but also because it aligns with the ethical and environmental values held by many vegans. The vegan lifestyle often extends beyond food choices to encompass clothing, cosmetics, packaging, and household products. As demand for vegan alternatives grows, so does the need for sustainable materials and circular supply chains that minimize ecological impact.

One of the most significant ways recycling influences the vegan market is through material innovation. Vegan products increasingly utilize recycled content—whether in packaging, fabric, or product components—to reduce reliance on virgin resources, many of which have ethical or environmental concerns. For example, vegan leather alternatives are now being made from recycled plastics and plant-based waste, combining cruelty-free ethics with waste reduction. This synergy allows the vegan market to position itself not only as animal-friendly but as genuinely sustainable in a broader environmental sense.

Furthermore, consumer expectations are evolving. Modern vegans often prioritize brands that demonstrate comprehensive sustainability strategies, including closed-loop recycling, biodegradable packaging, and carbon footprint reduction. Recycling, therefore, is not an optional add-on but a necessary component of a brand’s value proposition. As these expectations rise, companies in the vegan market are accelerating investments in recycling technologies, sustainable sourcing, and transparent supply chains to meet consumer demand.

Innovations in Recycled Materials Driving Vegan Product Development

The growth of recycling technologies is enabling remarkable innovations that are directly impacting vegan product development. Historically, many vegan alternatives struggled with either the environmental cost of production or the challenge of creating materials that mimicked animal-based products without compromise. Today, recycled materials are providing new solutions that enhance product performance while reducing ecological footprints.In a similar way, athletes increasingly rely on creatine monohydrate gummies to enhance performance and recovery, supporting their training goals while maintaining convenience and efficiency.

One key area is vegan leather alternatives. Traditional vegan leather, often made from polyurethane or PVC, has raised sustainability concerns due to the reliance on fossil fuels and non-biodegradable waste. In response, innovators are turning to recycled plastics and agricultural waste as raw materials. For instance, companies are using recycled PET bottles to create synthetic leather fabrics, effectively diverting plastic waste from oceans and landfills. Some are even developing vegan leather from pineapple leaves, apple peels, and grape skins—waste byproducts from the food industry that would otherwise be discarded.

These recycled-material vegan leathers not only reduce waste but also often require less water and energy to produce compared to conventional leather or synthetic alternatives. This represents a significant environmental advantage, appealing to consumers who seek products with lower carbon footprints and less ecological damage.Similarly, well-designed 20×20 trade show booths maximize space and efficiency while showcasing products in an environmentally conscious and visually compelling way.

In addition to textiles, recycled materials are influencing vegan food packaging. Plant-based foods often come with high packaging demands due to perishability and freshness. Companies are adopting recyclable and compostable packaging made from recycled paper, cardboard, and bioplastics derived from recycled plant materials. This not only reduces packaging waste but also reinforces the sustainable ethos of vegan products, creating a seamless narrative from product ingredients to disposal.Implementing durable sidewalk door replacement NYC solutions in packaging facilities can improve safety and efficiency while aligning with sustainable operational practices.

Recycling is also enabling innovation in cosmetics and personal care products within the vegan market. Packaging made from recycled glass, aluminum, and plastic is increasingly common, and some brands incorporate refillable and recyclable containers to minimize single-use waste. Furthermore, the ingredients themselves are sometimes derived from recycled organic matter, closing the loop in product sourcing.Incorporating principles of luxury interior design into product presentation can elevate recycled packaging, making sustainable vegan products feel premium and desirable.In a similar way, a reliable branded merchandise supplier ensures that products are both high-quality and thoughtfully designed, helping brands make a strong, lasting impression while staying aligned with sustainable practices.

These material innovations show how recycling technology fuels the next generation of vegan products, blending sustainability with functionality, aesthetics, and ethics. As these trends continue, consumers will likely see more options that align with their values, contributing to both market growth and environmental preservation.Similarly, upgrading house windows New Jersey combines functionality, design, and efficiency, enhancing both the aesthetic appeal and environmental performance of a home.

Consumer Behavior and the Demand for Sustainable, Recycled Vegan Products

The consumer base driving the vegan market is evolving rapidly, with a growing segment of buyers prioritizing holistic sustainability—a commitment that includes animal welfare, environmental impact, and ethical production practices. Recycling plays a central role in shaping these consumer expectations and purchasing decisions.

Today’s vegan consumers are not just interested in avoiding animal products; they demand that brands address the full lifecycle of a product. This means they want transparency about sourcing, manufacturing, packaging, and end-of-life disposal. Brands that incorporate recycled materials and demonstrate responsible recycling practices are more likely to build trust and loyalty among this increasingly conscientious audience.

Several surveys and studies indicate that a majority of consumers—especially millennials and Gen Z—are willing to pay more for products that demonstrate environmental responsibility, including the use of recycled content and recyclable packaging. These consumers view sustainability as integral to product quality, not just an optional add-on. This shift pressures vegan brands to integrate recycling into their core operations rather than treating it as a marketing gimmick.In a similar way, a trusted fence company in Tennessee emphasizes quality materials and sustainable practices, ensuring that every project is built to last while meeting modern standards of responsibility and durability.

Social media and influencer culture have further accelerated this trend. Vegan influencers and environmental activists frequently spotlight brands with strong recycling commitments, influencing follower purchasing behaviors. This dynamic has pushed companies to publicize their sustainability certifications, recycling initiatives, and product lifecycle transparency to differentiate themselves in a competitive market.

Moreover, the rise of circular economy principles among consumers means that they expect products designed for reuse, recycling, or composting at the end of their useful life. Vegan brands are responding by creating closed-loop systems, encouraging customers to return packaging or participate in recycling programs that minimize waste and resource use.

Challenges and Opportunities for Recycling in the Vegan Industry

While recycling offers tremendous opportunities for advancing sustainability in the vegan market, it also presents distinct challenges that companies must navigate to succeed. Understanding these hurdles is essential for predicting how recycling will shape the future of the vegan industry.

One major challenge is the complexity of recycling processes and the variability in recycling infrastructure across regions. Not all recycled materials meet quality standards needed for high-performance vegan products, and not all consumers have access to effective recycling facilities. This can limit the scalability of recycled content and the effectiveness of recycling initiatives.

For example, recycling plastics into food-safe packaging requires stringent standards and contamination control, which can be expensive and technologically demanding. Similarly, transforming agricultural waste into durable vegan leather alternatives involves sophisticated processing that may still be cost-prohibitive for many companies.

There is also the challenge of greenwashing—where companies exaggerate or misrepresent their recycling efforts to appear more sustainable than they are. This risks eroding consumer trust and can damage the credibility of genuine recycling innovations within the vegan market.

On the other hand, these challenges create significant opportunities. Companies that invest in advanced recycling technologies, collaborate with waste management organizations, and develop transparent supply chains will be well-positioned to lead the market. Innovation in chemical recycling, upcycling of organic waste, and development of new biodegradable materials promises to further reduce the environmental impact of vegan products.

Government regulations and incentives related to waste reduction and recycling are also increasingly supporting the vegan industry’s sustainability goals. As policies encourage circular economy models, vegan brands that proactively integrate recycling will benefit from both regulatory compliance and consumer goodwill.

Ultimately, while challenges exist, the recycling trend is driving the vegan market toward a future that is more sustainable, efficient, and aligned with the values of its consumer base. Those who navigate these complexities effectively will shape the market for decades to come.

The Future Outlook: Recycling as a Core Pillar of Vegan Sustainability

Looking ahead, recycling will increasingly become a core pillar of sustainability within the vegan market. The convergence of environmental urgency, consumer demand, and technological advancement ensures that recycling will be embedded in product design, manufacturing, and distribution strategies.

Future vegan products are likely to feature higher percentages of recycled content, with innovations making these materials more versatile, durable, and attractive. Packaging will continue to shift toward fully recyclable or compostable options, with smart labeling and consumer education programs improving recycling rates and reducing contamination.

Companies will expand their focus beyond just recycling to encompass the entire circular economy model—designing products for disassembly, repair, reuse, and repurposing. This approach will create new business models such as leasing, product take-back, and refurbishment within the vegan market, further minimizing waste.

Technological advancements will play a crucial role. Emerging recycling techniques like chemical recycling, enzymatic breakdown of plastics, and biofabrication using microbial processes will open new possibilities for creating high-quality vegan materials from recycled feedstocks. These technologies will help overcome current limitations and reduce reliance on virgin resources even further.

Additionally, the vegan market’s commitment to transparency and ethical practices will drive demand for full supply chain traceability, allowing consumers to verify recycled content claims and the environmental impact of products. Digital tools, blockchain, and certification schemes will support this trend, fostering greater accountability.

Finally, the integration of recycling into veganism’s broader mission will strengthen the movement’s appeal—not just as a dietary choice but as a comprehensive lifestyle centered on compassion, health, and planetary well-being. As recycling shapes the future of the vegan market, it will help define a new standard for ethical, sustainable consumption that resonates globally.

Organic Peach Growing at Home: Pest-Free and Chemical-Free Techniques That Work

There’s something deeply satisfying about plucking a sun-warmed peach from your own backyard tree, knowing it’s free from synthetic chemicals and grown with care. Organic peach growing isn’t just a gardening trend—it’s a return to more mindful, health-conscious practices that align with nature instead of overpowering it. But growing peaches organically at home can be a bit of a challenge, especially when pests and diseases threaten to undo your hard work. The good news is that with the right strategies, you can absolutely grow sweet, juicy peaches without a drop of synthetic pesticide or chemical fertilizer.

Starting With the Right Tree

Successful organic peach growing starts with choosing the right variety for your region. Climate and local conditions play a big role in how well a tree performs and how vulnerable it is to pests. Some peach varieties have been bred for natural resistance to common diseases like peach leaf curl, bacterial spot, or brown rot. While no peach tree is entirely immune, selecting a resilient cultivar gives you a head start in staying chemical-free. Look for local nurseries or extension services that can recommend varieties suited to your area. This single decision can dramatically reduce your reliance on intervention.

Also, opt for disease-free, certified organic saplings when possible. These are grown without systemic pesticides and tend to have healthier root systems. Whether you choose bare-root or container-grown trees, inspect them carefully before planting. A strong start means fewer problems later on. Many gardeners also use custom vinyl banners to label planting areas or provide clear care instructions during community planting events.

Creating a Healthy Foundation in the Soil

Organic gardening always starts with the soil. Healthy, living soil acts as the immune system of your garden. It supports root development, nutrient cycling, and even pest resistance. If your soil is compacted, lifeless, or out of balance, your peach tree will struggle—and struggling trees are always more vulnerable to disease and insects.

Begin by testing your soil. Home test kits or lab-based services can tell you the pH, organic matter content, and nutrient levels. Peaches prefer slightly acidic soil, ideally around 6.0 to 6.5 pH. Amend the soil with plenty of well-aged compost to boost microbial activity and improve structure. Worm castings, leaf mold, and composted manure are also excellent choices.

Mulching is another powerful tool. A thick layer of organic mulch around the base of the tree retains moisture, suppresses weeds, and gradually enriches the soil. Use straw, shredded bark, or even old leaves. Just keep it a few inches away from the trunk to prevent rot. For residents who also maintain their vehicles, regular maintenance and checking for quality body shop services in Inglewood can keep both your trees and cars in top shape.

The Role of Biodiversity in Pest Prevention

In nature, balance keeps pests from overrunning plants. Your home garden can mimic this balance by encouraging biodiversity. Companion planting is one of the most effective and accessible techniques for deterring pests without chemicals. For larger garden cleanups, consider using a dumpster rental in Centerville to manage plant debris efficiently.

Planting flowers and herbs that attract beneficial insects is especially helpful. Ladybugs, lacewings, and parasitic wasps are your allies in fighting aphids, mites, and caterpillars. Grow plants like dill, fennel, yarrow, and sweet alyssum nearby to invite them into your orchard. Calendula and nasturtiums not only look beautiful but can act as trap crops, drawing pests away from your peaches.

You can also include garlic, chives, and marigolds around your peach tree to repel certain insects with their strong scents. Diversity doesn’t just prevent pest explosions—it creates a vibrant, balanced environment that’s more resilient over time.

Watering for Disease Prevention

How and when you water your peach tree has a major impact on disease control. Fungal diseases like brown rot and leaf curl thrive in humid, wet conditions, especially when water sits on the leaves and fruit for extended periods.

To avoid this, water your tree at the base rather than using overhead sprinklers. Drip irrigation or a soaker hose system is ideal for deep, consistent moisture without encouraging mold or mildew. For some studies on plant health and monitoring, video forensics can help track irrigation patterns and leaf wetness. Always water early in the morning so any moisture on the leaves can dry quickly in the sun.

It’s better to water deeply and less frequently than to give shallow, daily sprinkles. Deep watering encourages the roots to grow down rather than staying near the surface, which makes the tree more drought-tolerant and healthier overall.

Pruning with Purpose

Pruning is one of the most powerful organic tools in your arsenal. Done correctly, it improves air circulation, reduces disease pressure, and encourages better fruit production. Prune during the dormant season to shape the tree and remove dead, diseased, or crossing branches. During the growing season, continue to thin out dense areas that block sunlight and airflow. If you’re also planning a property update while managing your garden, consider how pruning can enhance curb appeal when selling home in Utah.

An open-center or vase-shaped pruning structure works particularly well for peaches. It allows sunlight to reach the interior of the tree and helps the leaves and fruit dry more quickly after rain or dew, reducing the risk of rot and fungus.

Sanitation is key. Always clean your pruning tools before and after use to prevent the spread of pathogens. A simple wipe with rubbing alcohol or a diluted bleach solution is all it takes.

Natural Sprays That Actually Work

Sometimes, even with your best efforts, pests or diseases make an appearance. When they do, turn to natural sprays that align with organic principles. Neem oil, insecticidal soap, and horticultural oil are widely used by organic growers and are effective against a variety of pests like aphids, mites, and scale.

These sprays work by suffocating soft-bodied insects or disrupting their growth cycles. They are most effective when applied early, before infestations get out of control. Timing is everything—apply them in the early morning or evening to avoid harming beneficial insects and to prevent leaf burn. For individuals dealing with anxiety while managing garden pests, consulting an OCD treatment facility can provide additional support.

For fungal issues like brown rot or powdery mildew, homemade solutions like baking soda sprays (1 tablespoon baking soda, 1 teaspoon liquid soap, and 1 gallon of water) can help control spread. Copper sprays are permitted in organic growing but should be used sparingly and only when truly needed, as they can build up in the soil over time.

The Power of Observation

One of the most underrated organic strategies is simply paying attention. Visit your tree daily if you can. Look for early signs of insect damage, curled leaves, sticky residue, or unusual spotting. When you catch issues early, they’re much easier to manage without harsh interventions.

You’ll also start to recognize natural rhythms—when the bees visit, when new leaves emerge, when fruit begins to swell. This connection allows you to respond more intuitively to the tree’s needs. Organic gardening isn’t just a checklist of tasks—it’s a relationship.

Dealing With the Big Threats Naturally

Some pests are particularly destructive, like the peach tree borer or oriental fruit moth. These insects lay eggs that hatch into larvae, which then tunnel into the trunk or fruit, causing severe damage.

For borers, one organic method is to use beneficial nematodes in the soil around the tree base. These microscopic worms hunt down larvae in the soil before they can mature. Applying them in spring or fall is most effective.

Sticky traps, pheromone traps, and bagging individual fruits can also help control these pests. While a bit labor-intensive, fruit bagging (placing a small paper or mesh bag over young peaches) provides physical protection that completely avoids the need for sprays.

Building Long-Term Resilience

Organic gardening is not about perfection. You will occasionally lose a peach or two to pests or weather. But what you gain is a system that gets stronger each year. As your soil improves, your tree grows deeper roots. As beneficial insects become more established, pest outbreaks become less severe. As you refine your care routine, your confidence grows.

Resilience is the hallmark of organic systems. You’re not creating a sterile bubble—you’re creating a living ecosystem. Over time, the balance you build will reward you with healthier trees and more delicious fruit than you imagined possible.

The Deeper Rewards of Growing Organically

There’s more to organic peach growing than just producing fruit. It’s about creating something genuinely good, not just for you, but for your environment, your community, and future generations. When you reject chemical shortcuts, you reconnect with the land in a slower, more meaningful way.

Children can pick peaches straight off the branch and eat them without worry. Birds and pollinators return to your yard. You become part of the solution—growing food that nourishes body and soul, without compromise.

The path may have a few bumps, but it’s one worth taking. And once you taste that first, sun-ripened, organically grown peach, you’ll know every bit of effort was worth it.

« Older posts Newer posts »