Category: BLOG (Page 2 of 3)

Seasonal Chrysanthemum Gardening: How to Grow Beautiful Blooms Through Every Season

Chrysanthemums, often affectionately called mums, are among the most beloved flowers for home gardeners. Their vibrant colors and diverse forms can transform any garden or indoor space into a living canvas. Unlike some flowers that bloom briefly and vanish, chrysanthemums offer a unique appeal: with careful attention, they can provide continuous beauty across seasons. Seasonal chrysanthemum gardening isn’t just about planting and forgetting; it’s about understanding their life cycle, adapting to seasonal changes, and nurturing them with a balance of science and intuition.
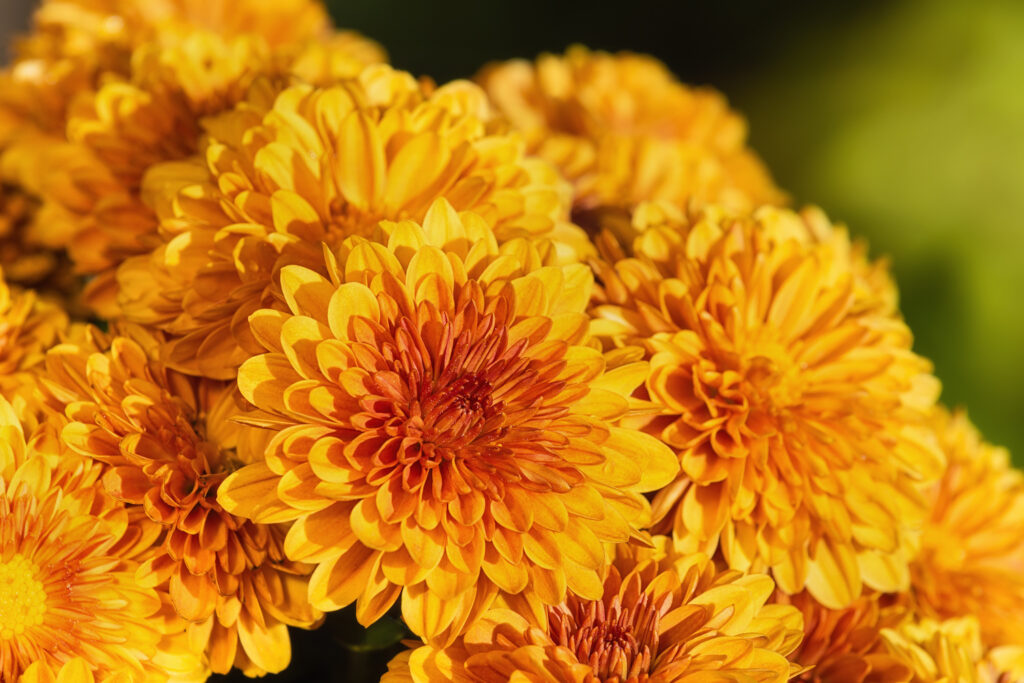
Understanding Chrysanthemums and Their Seasonal Needs

To master chrysanthemum gardening year-round, it’s important to understand what makes these flowers tick. Chrysanthemums are hardy perennials in many climates, meaning they can live for several years if cared for properly. However, their growth and blooming are highly influenced by photoperiod, or the length of daylight. Most garden chrysanthemums are classified as short-day plants, which means they require long nights to initiate flowering. This explains why you often see chrysanthemums blooming beautifully in the fall, a time when day length shortens naturally.

Yet, with some thoughtful interventions, you can extend their flowering period or even enjoy blooms in off-peak seasons. Seasonal gardening is essentially about adapting your care strategies to the natural rhythms of your chrysanthemum plants, from soil preparation and watering to pruning and pest management.

Spring: Laying the Foundation for Healthy Growth

Spring is the season of awakening, and chrysanthemums are no exception. After the cold dormancy of winter, spring is the perfect time to revive your plants and prepare them for the months ahead. The first step is to inspect the roots and stems of your perennials. Remove any dead leaves, damaged stems, or shriveled roots. This simple act of cleanup not only improves aesthetics but also prevents disease from lingering into the growing season.

Soil preparation in spring is crucial. Chrysanthemums thrive in well-drained, fertile soil enriched with organic matter. Adding compost or well-rotted manure provides the nutrients necessary for strong growth. At this stage, it’s also wise to divide older clumps, a process that rejuvenates the plant and encourages more vigorous blooms. Spring is not yet the flowering season, so the focus should be on encouraging healthy leafy growth. A balanced fertilizer with a slightly higher nitrogen content helps stimulate lush foliage, laying a strong foundation for the flowering months ahead.

Summer: Nurturing Growth and Encouraging Bud Formation

Summer is when chrysanthemums truly stretch towards the sun. During these warmer months, they require consistent watering, especially if grown in containers, since dry conditions can cause stress and stunt growth. Watering deeply in the morning is ideal, allowing the roots to absorb moisture before the heat of the day intensifies. While chrysanthemums love sunlight, they can suffer if exposed to the harshest midday rays. Partial shade or dappled sunlight can prevent leaf scorch and maintain a vibrant appearance.

Summer is also the time for careful pruning. Pinching back the tips of stems encourages branching, which in turn leads to more flower buds later in the season. Timing is key: begin pinching early in the season, then gradually reduce as the plant approaches bud formation. Fertilization during summer should shift slightly from nitrogen-heavy blends to ones richer in phosphorus and potassium, which support bud development and overall plant resilience. Summer care is not glamorous, but it is the invisible work that determines the size, color, and abundance of your fall blooms.

Fall: The Peak of Chrysanthemum Glory

Fall is the season most people associate with chrysanthemums, and for good reason. By now, months of diligent care bear fruit in the form of lush, vibrant blooms. The shortening daylight triggers the flowering response, transforming green foliage into spectacular displays of reds, oranges, yellows, purples, and whites. During this season, it’s crucial to focus on protecting the flowers and enhancing their beauty. Deadheading spent blooms encourages the plant to produce additional flowers, extending the visual feast.

Soil moisture becomes especially important in fall. A consistent watering schedule prevents stress and keeps the blooms fresh. Many gardeners also add a layer of mulch around the base, which stabilizes soil temperature and preserves moisture. The fall season is also prime time for enjoying creative arrangements. Chrysanthemums can be combined with ornamental grasses, pumpkins, or other seasonal plants to create stunning displays in gardens, patios, or entryways. The key is to let the natural rhythm of the plant shine while providing supportive care.
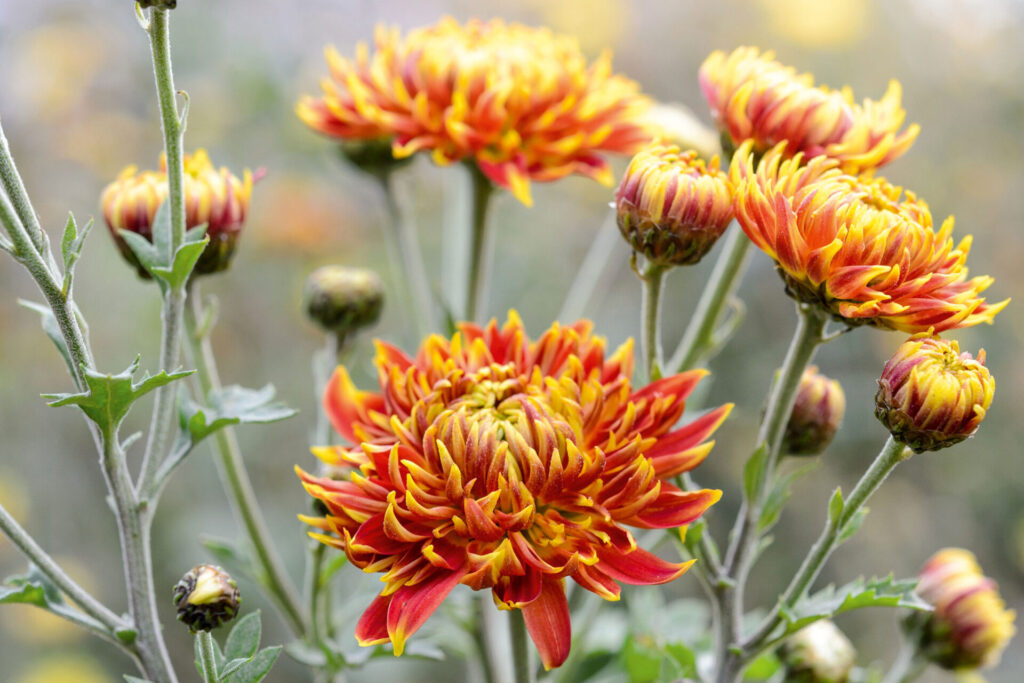
Winter: Protecting and Preparing for the Next Cycle

While it might seem like chrysanthemums disappear during winter, this season is just as important as the others for long-term gardening success. Depending on your climate, chrysanthemums may go dormant, slowing growth and conserving energy. In cold regions, winter protection is essential. Mulching with straw or leaves, covering plants with frost cloth, or moving container chrysanthemums indoors can prevent freeze damage.

Indoor care during winter involves maintaining moderate temperatures and indirect sunlight, which ensures that the plants survive without wasting energy. Overwatering is a common mistake during this season; dormant chrysanthemums require significantly less moisture. Winter is also an excellent time to reflect on the past season’s successes and challenges, plan adjustments to soil, fertilization, or planting schedules, and prepare new cuttings for propagation in spring. By respecting the plant’s natural dormancy, gardeners set the stage for a vigorous return in the next growing season.

Indoor Chrysanthemums: Bringing Seasonal Beauty Inside

Not every gardener has the luxury of vast outdoor space, but chrysanthemums can thrive indoors with a little planning. Indoor mums need bright, indirect light, ideally from south-facing windows. They benefit from consistent humidity, which can be tricky in heated homes during winter. Regular misting or a small humidifier can make a noticeable difference in leaf health.

Indoor seasonal care mirrors the outdoor approach: spring is for encouraging leafy growth, summer for careful pruning and watering, fall for bloom celebration, and winter for rest and protection. The advantage of indoor cultivation is flexibility; with controlled light and temperature, it’s possible to manipulate flowering times and enjoy chrysanthemums almost year-round. Adding indoor mums to home décor not only brings color but also enhances mood and indoor air quality, making them a practical and aesthetic choice.

Common Challenges and Seasonal Solutions

Even experienced gardeners encounter challenges, and chrysanthemums are no exception. Seasonal transitions can exacerbate common issues like pests, diseases, and nutrient deficiencies. Aphids, spider mites, and leaf miners tend to appear in spring and summer, while fungal diseases such as powdery mildew or leaf spot can arise during periods of high humidity. Careful monitoring, proper spacing, and timely removal of affected leaves often prevent minor problems from escalating.

Nutrient management is another challenge. Seasonal adjustments in fertilization, such as boosting phosphorus for bud development in late summer or potassium for winter hardiness, are critical for continuous health. In addition, improper pruning or pinching schedules can reduce bloom potential. The key is attentiveness and responsiveness, treating each season as a unique phase of the chrysanthemum’s life cycle rather than a static plant that behaves the same year-round.

Enhancing Seasonal Appeal with Design and Variety

Seasonal chrysanthemum gardening is not just about horticulture; it’s also an art form. Different varieties bloom at different times and in diverse forms, from cushion-shaped pompons to elegant spider mums. Mixing early, mid, and late-blooming cultivars can ensure continuous color from late summer through fall. Gardeners can also play with texture and height, pairing chrysanthemums with tall grasses, evergreen shrubs, or trailing vines to create dynamic compositions.

Containers and raised beds offer even more flexibility, allowing gardeners to move plants to optimal sunlight, protect them from frost, or create thematic seasonal arrangements. The joy of chrysanthemum gardening lies not only in the blooms themselves but also in the creative expression they allow, turning any space into a seasonally evolving masterpiece.
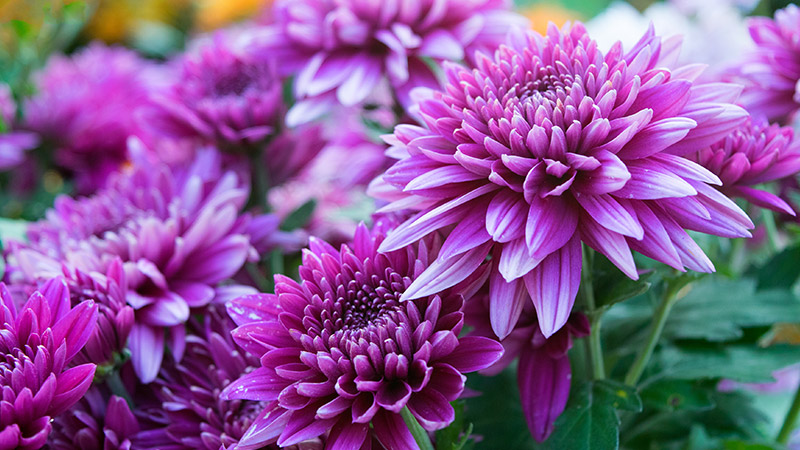
Conclusion: A Year-Round Relationship with Chrysanthemums

Growing chrysanthemums through every season requires more than knowledge; it demands patience, observation, and a willingness to adapt. From the vigor of spring growth to the glory of fall blooms and the quiet dormancy of winter, these plants teach gardeners the beauty of cyclical care. By understanding their seasonal needs, providing tailored care, and embracing creative planting strategies, you can enjoy continuous bursts of color, texture, and life in your garden or home throughout the year.

Chrysanthemums are more than flowers—they are companions in the garden, marking the passage of seasons and rewarding attentive gardeners with their radiant beauty. Seasonal chrysanthemum gardening is an invitation to connect with nature’s rhythm, to learn the subtle language of growth and bloom, and to celebrate the ever-changing palette of life in your own backyard. With dedication and love, your chrysanthemums can transform every season into a vivid, living celebration of color and life.

How to Grow Lush, Flavorful Organic Basil Year-Round

There’s something magical about stepping into your kitchen and snipping fresh basil straight from your own garden. The aroma, the vibrant green leaves, and the intense flavor that can only come from homegrown, organic plants transform everyday cooking into something extraordinary. Growing basil at home is not only satisfying but also surprisingly achievable, even if you have limited space or no traditional garden. With a little attention and care, you can enjoy lush, flavorful basil all year long.

Choosing the Right Basil Varieties

The first step in growing basil successfully is choosing the right variety. While sweet basil is the classic choice for pesto and Italian dishes, other varieties like Genovese, Thai, Lemon, and Purple Basil each bring unique flavors and aromas to your kitchen. For year-round growth, it helps to consider your climate and growing conditions. Some basils are more resilient indoors, thriving under consistent light and temperature, while others flourish outdoors during warmer months. Experimenting with multiple varieties can provide a continuous harvest and keep your culinary creations exciting.

Selecting the Perfect Growing Environment

Basil thrives on warmth, sunlight, and humidity. Indoors, a south-facing windowsill is ideal, offering at least six hours of direct sunlight daily. If natural light is limited, full-spectrum grow lights can fill the gap, ensuring the plant’s photosynthesis process continues uninterrupted. Outdoors, basil prefers a spot sheltered from strong winds, which can damage delicate stems and leaves. Whether inside or outside, soil temperature should stay between 70 and 80 degrees Fahrenheit for optimal growth. Basil is sensitive to cold, and even brief exposure to frost can stunt its development or kill the plant entirely. Creating a consistent environment is key to nurturing healthy, flavorful leaves.

Preparing the Soil for Organic Growth

The foundation of any thriving basil plant is rich, well-draining soil. Organic basil grows best in soil enriched with compost or other natural amendments that provide essential nutrients without synthetic chemicals. A mix of loamy soil and organic compost creates a balance of aeration and moisture retention, allowing roots to expand freely while avoiding waterlogging. Adding a small amount of organic perlite or vermiculite can improve drainage further, ensuring the roots remain healthy. The pH level should ideally sit between 6 and 7, slightly acidic to neutral, which promotes nutrient absorption and robust growth.

Starting from Seeds or Seedlings

Starting basil from seeds offers a rewarding sense of accomplishment, but it requires patience. Seeds should be sown in shallow containers, lightly covered with soil, and kept moist until germination, which typically occurs within seven to ten days. Maintaining warmth and consistent moisture during this stage is critical, as basil seeds are delicate and sensitive to drying out. For gardeners seeking immediate results, organic seedlings from a nursery provide a head start, allowing you to transplant healthy young plants directly into your prepared soil. Whichever method you choose, spacing is important—plants should have at least 12 inches between them to allow air circulation and prevent fungal issues.

Watering and Maintaining Moisture

Watering basil correctly is more art than science, and overwatering is a common mistake among beginners. The soil should remain consistently moist but never soggy. Deep, infrequent watering encourages roots to grow downward, creating a stronger and more drought-resistant plant. Indoors, check soil moisture regularly by inserting your finger an inch into the soil; if it feels dry, it’s time to water. Outdoors, rainfall may reduce the need for supplemental watering, but in dry spells, supplemental irrigation can prevent leaves from wilting or developing a bitter taste. Using a gentle, slow stream of water ensures the leaves remain intact and reduces the risk of disease.

Providing Adequate Light and Temperature

Basil is a sun-loving herb that demands plenty of light to produce vibrant, flavorful leaves. Indoors, positioning plants near windows that receive full sunlight is ideal, but during shorter winter days, supplemental grow lights may be necessary to maintain year-round growth. Temperature plays an equally important role—basil thrives in warmth, and exposure to temperatures below 50 degrees Fahrenheit can cause leaves to turn yellow and growth to stall. For indoor gardeners, maintaining a steady room temperature and avoiding cold drafts ensures your plants continue to flourish. Outdoors, choosing the right planting season or using protective coverings like cloches or row covers can extend the growing period significantly.

Pruning and Encouraging Leaf Growth

Regular pruning is essential for lush basil. Pinching off the top sets of leaves encourages the plant to branch out, creating a fuller, bushier appearance rather than a tall, leggy stem. It also prevents the plant from flowering too early, as flowering can make leaves taste bitter and reduce overall leaf production. Harvesting frequently stimulates continuous growth, and removing leaves thoughtfully rather than in large sections ensures the plant remains healthy. Learning to recognize the optimal leaves for harvesting—typically the largest, most mature ones—helps you maintain a consistent supply of fresh basil without stressing the plant.

Organic Fertilization and Soil Care

Even with rich organic soil, basil benefits from supplemental nutrition throughout its growing cycle. Using organic fertilizers like compost tea, worm castings, or liquid seaweed promotes healthy growth without introducing harmful chemicals. Fertilization should be balanced—too much nitrogen encourages leafy growth at the expense of flavor, while too little can lead to stunted plants. Periodically amending soil with organic matter maintains its fertility and structure, allowing roots to thrive and leaves to develop their characteristic vibrant aroma and taste.

Managing Pests and Diseases Naturally

Growing basil organically requires vigilance against pests and diseases. Aphids, whiteflies, and spider mites are common offenders, but natural solutions such as neem oil, insecticidal soap, or introducing beneficial insects like ladybugs can control infestations without chemicals. Powdery mildew and fungal issues may appear in humid or poorly ventilated areas, but proper spacing, air circulation, and watering at the soil level rather than on leaves minimize these risks. Observing your plants closely and taking action at the first sign of trouble ensures that your basil remains healthy and flavorful throughout the year.

Extending the Growing Season

For year-round basil, gardeners must think creatively. Indoors, pots and containers allow continuous cultivation, with careful attention to light, temperature, and humidity. Outdoors, raised beds or greenhouses can extend the growing season by providing protection from cold snaps and fluctuating weather. Some enthusiasts even use hydroponic or aquaponic systems to maintain optimal growth conditions throughout winter. The key is understanding your plant’s needs and adapting your environment accordingly—basil responds beautifully to attentive, consistent care.

Harvesting and Storing Fresh Basil

Harvesting basil at the right time ensures maximum flavor. The best leaves are vibrant green, firm, and free from discoloration or damage. Snipping leaves in the morning, after the dew has dried, preserves essential oils and enhances taste. For long-term storage, basil can be frozen, dried, or preserved in oil, retaining much of its aroma and flavor. Indoor gardeners can enjoy fresh basil every day, while outdoor growers may create a seasonal stockpile, making their homegrown herb a staple for countless dishes.

The Joy of Homegrown Organic Basil

Growing basil at home is more than just a gardening project—it’s a journey that connects you to your food, your kitchen, and the rhythms of nature. There’s unparalleled satisfaction in watching tiny seedlings transform into thriving plants that reward your care with fragrance, color, and taste. Organic basil grown with intention and love has a depth of flavor that store-bought herbs can rarely match. Year-round cultivation allows creativity in the kitchen, from classic Italian recipes to innovative culinary experiments. Each leaf you harvest is a reminder of the care and dedication that went into nurturing it.

The process also fosters mindfulness. Daily attention to watering, pruning, and observing growth encourages a deeper understanding of plant biology and the interconnectedness of nature. The subtle aroma wafting through your home or balcony offers constant sensory pleasure, turning cooking into a full-bodied experience. For many, basil becomes more than a herb—it becomes a companion, a symbol of the seasons, and a small but powerful way to live sustainably and healthfully.

In essence, growing lush, flavorful organic basil year-round is an achievable dream for any home gardener. With careful selection of varieties, attention to soil, water, light, and temperature, and a dedication to organic care, your basil plants can thrive regardless of the season. Each snip of a vibrant green leaf rewards you not only with culinary delight but also with the quiet satisfaction of nurturing life. Homegrown basil transforms meals, enriches your living space, and invites you into a more mindful, flavorful way of living.

Alocasia Black Velvet Care at Home: The Ultimate Guide for Beginners

Understanding the Allure of the Alocasia Black Velvet

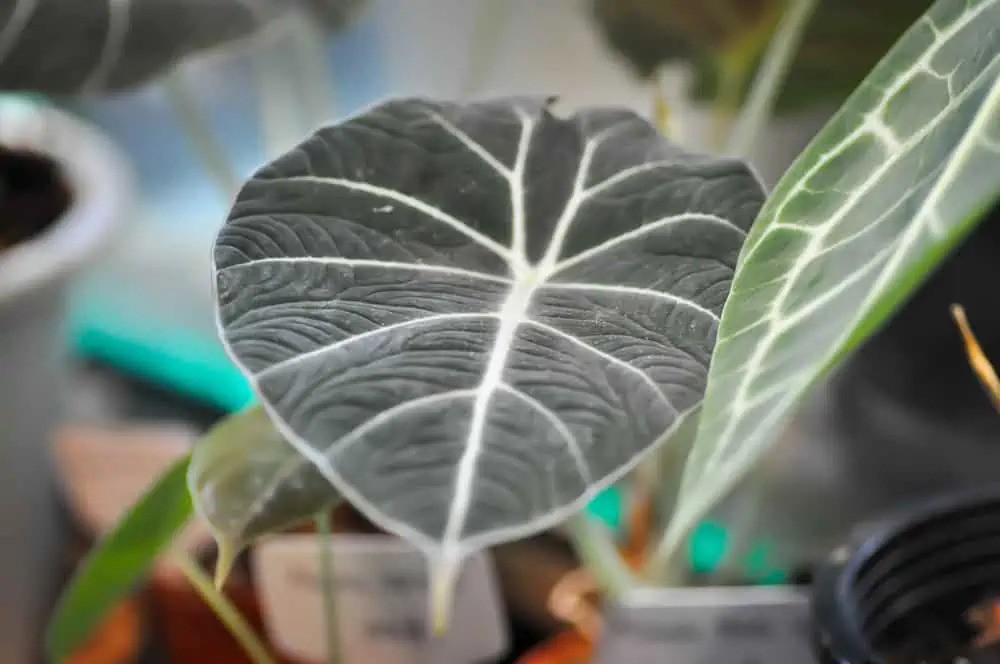
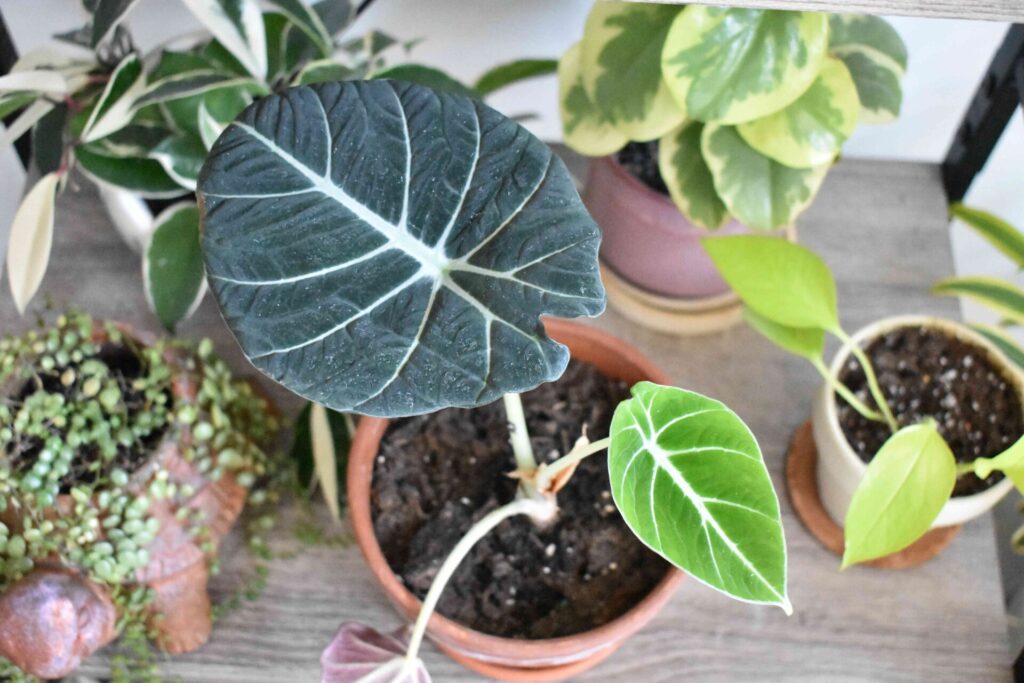
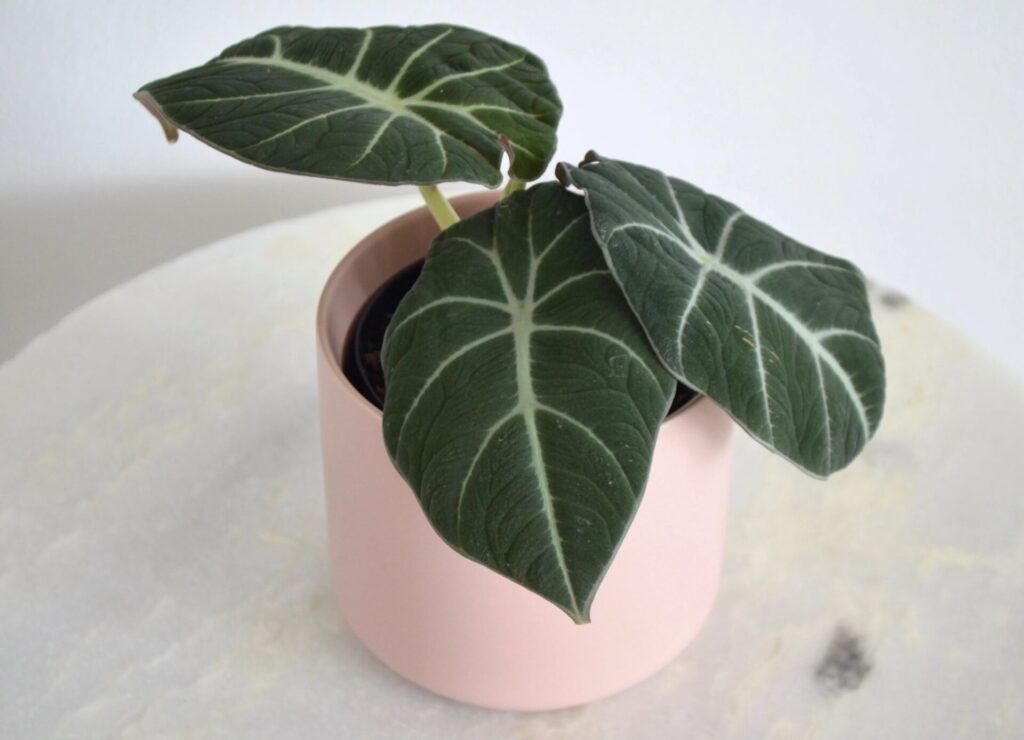
The Alocasia Black Velvet is one of those rare plants that feels more like a piece of art than a member of your houseplant collection. Its deep, velvety leaves and silver veins capture attention instantly, creating a dramatic contrast that fits beautifully into both minimalist interiors and plant-filled urban jungles. For beginners, though, this plant’s beauty can be intimidating. Many new plant parents assume it’s too delicate or too demanding to grow at home. The truth is far gentler: with the right conditions and a little attentive care, the Alocasia Black Velvet becomes a surprisingly manageable and deeply rewarding companion.

Part of its charm lies not just in its appearance but in its personality. This plant responds quickly to its environment, showing visible signs when it’s happy and clear signals when something is off. That level of responsiveness makes it a wonderful teacher for beginners who want to develop a deeper relationship with plant care. When you understand what this plant needs, you’ll find that caring for it is less about perfection and more about consistency.

Creating the Ideal Lighting Environment

The Alocasia Black Velvet thrives in bright but indirect light. Direct sunlight is too harsh for its tender, textured leaves and can quickly cause discoloration or burnt edges. Think of a spot where light filters softly through a curtain or bounces off a nearby wall. This mimics the dappled light the plant would experience in its natural habitat under the forest canopy. When the lighting is right, you’ll notice the leaves developing richer coloration and stronger veins. When light is insufficient, the plant may grow leggy or slow down dramatically, signaling that it needs a brighter space.

For many homes, an east-facing window is ideal. Morning sunlight is gentle enough to avoid scorching but still strong enough to support growth. A north-facing window can work too, as long as it receives steady brightness throughout the day. If your home lacks abundant natural light, placing the plant under a grow light is a reliable alternative. Modern grow lights are adjustable and discreet, and many plant enthusiasts find that their Alocasia Black Velvet responds beautifully to a consistent artificial setup.

Mastering Watering Without Stress

Watering is one of the most misunderstood aspects of Alocasia Black Velvet care. The plant enjoys moisture, but its roots despise being waterlogged. The trick is to strike that comfortable middle ground where the soil stays slightly damp but never soggy. When you water, do so thoroughly until the excess drains out, then allow the top layer of soil to partially dry before watering again.

What makes this process simpler is paying attention to the plant’s cues. The Alocasia Black Velvet will often tell you when it’s thirsty. Leaves may start to droop lightly, or the soil may feel especially dry to the touch. Overwatering, on the other hand, leads to limp foliage, yellowing leaves, and darkened stems. These are warning signs you don’t want to ignore, as consistent overwatering can invite root rot, a common issue for beginners.

The season matters too. During spring and summer, when the plant is actively growing, it will consume water more quickly. In fall and winter, its growth slows and so does its thirst. Adjusting your routine to your plant’s seasonal rhythm makes the process feel more natural and far less like guesswork.

Choosing the Right Soil and Pot for Success

The Alocasia Black Velvet thrives in an airy, fast-draining soil mix. Because its roots prefer oxygen-rich environments, compact or dense soil can suffocate them. Many growers find success with a mix that includes components like orchid bark, perlite, and high-quality potting soil. This blend creates pockets of air while still retaining the moisture the plant needs.

The pot matters just as much as the soil. A pot with drainage holes is essential. Without them, water pools at the bottom and puts your plant at risk. Terracotta pots are a popular choice because they help wick away excess moisture, though they may require more frequent watering. Ceramic or plastic pots retain moisture longer, making them suitable for people who prefer a slightly more forgiving schedule.

Repotting the Alocasia Black Velvet isn’t something you need to do frequently. This plant likes a snug home, and giving it too much space too soon can lead to moisture imbalance. Repot only when the roots clearly outgrow the pot or start circling the bottom.

Embracing the Importance of Humidity

Humidity is the secret ingredient to truly happy Alocasia Black Velvet care. This plant originates from tropical environments where the air is naturally moist, and while it can adapt to typical indoor humidity, it will genuinely thrive when given more. You may notice the leaves expanding more fully, the texture growing richer, and new growth emerging more regularly when humidity levels are ideal.

One of the simplest ways to support your plant is by placing it near other plants. Grouping creates a microclimate that naturally boosts moisture in the air. Another method is to set a small humidifier nearby, especially during winter when heaters tend to dry out indoor spaces. Even a pebble tray filled with water beneath the pot can raise humidity slightly, though it won’t match the consistency of a humidifier.

Avoid misting the leaves directly. While misting can momentarily increase moisture, it also encourages fungal issues and spots on the velvet-like foliage. Focus instead on creating a stable environment rather than short bursts of humidity.

Feeding Your Plant for Steady Growth

While the Alocasia Black Velvet isn’t a heavy feeder, it does appreciate regular nutrients during the growing season. A diluted, balanced fertilizer applied every few weeks in spring and summer is usually enough to support healthy leaf development and vibrant color. The key here is moderation. Too much fertilizer, especially applied too frequently, can burn the roots and stress the plant.

During fall and winter, allow the plant to rest. Its growth naturally slows, and feeding during this period can disrupt its cycle. Observing these natural rhythms prepares you to understand the deeper patterns of plant care, making the entire experience more intuitive over time.

Combatting the Most Common Pests and Problems

Even with attentive care, pests may occasionally find their way to your Alocasia Black Velvet. Spider mites are the most frequent visitors, attracted to the plant’s textured leaves. They thrive in dry environments, which is yet another reason why maintaining proper humidity is invaluable. If you notice webbing or stippling on the leaves, it’s time to act quickly. Gently wiping the leaves with a damp cloth and using a plant-safe treatment helps restore balance.

Fungus gnats can appear if the soil stays too moist, while scale or mealybugs may show up if the plant is stressed. These situations aren’t a sign of failure. Every plant parent encounters pests at some point. The key is responding early and maintaining routines that minimize the chances of recurrence.

Yellowing leaves, softened stems, or a lingering musty smell often indicate overwatering. Crispy edges or pale foliage may point toward underwatering or inadequate light. Once you recognize these signs, the solutions become increasingly straightforward.

Learning to Propagate Your Alocasia Black Velvet

For many plant lovers, propagation is one of the most rewarding aspects of caring for an Alocasia Black Velvet. This plant grows from corms—small, bulb-like structures beneath the soil. When repotting, you may discover these corms nestled beside the main root system. With patience, you can grow these into new plants.

Propagation requires steady warmth, gentle moisture, and a lot of time. Watching a tiny corm transform into a leaf-bearing plant is nothing short of magical. This process also deepens your understanding of your plant and connects you more intimately with its life cycle.

Bringing It All Together for a Thriving Plant

Caring for an Alocasia Black Velvet at home isn’t about following rigid rules. It’s about observing, responding, and creating conditions that allow the plant to express itself fully. When you develop a rhythm with your plant—adjusting light, tuning into its watering needs, maintaining humidity, and nurturing its growth—you build a relationship that grows richer with time.

What may begin as careful tending soon evolves into intuition. You’ll know when the leaves look especially lush because the light is perfect. You’ll recognize when the soil is just right or when your plant craves a break from watering. This transformation is what makes the Alocasia Black Velvet such a beloved choice for both beginners and seasoned plant enthusiasts. It encourages you to slow down, pay attention, and enjoy the quiet satisfaction of nurturing something truly beautiful at home.

Understanding Arrowhead Vine: A Perfect Indoor Companion

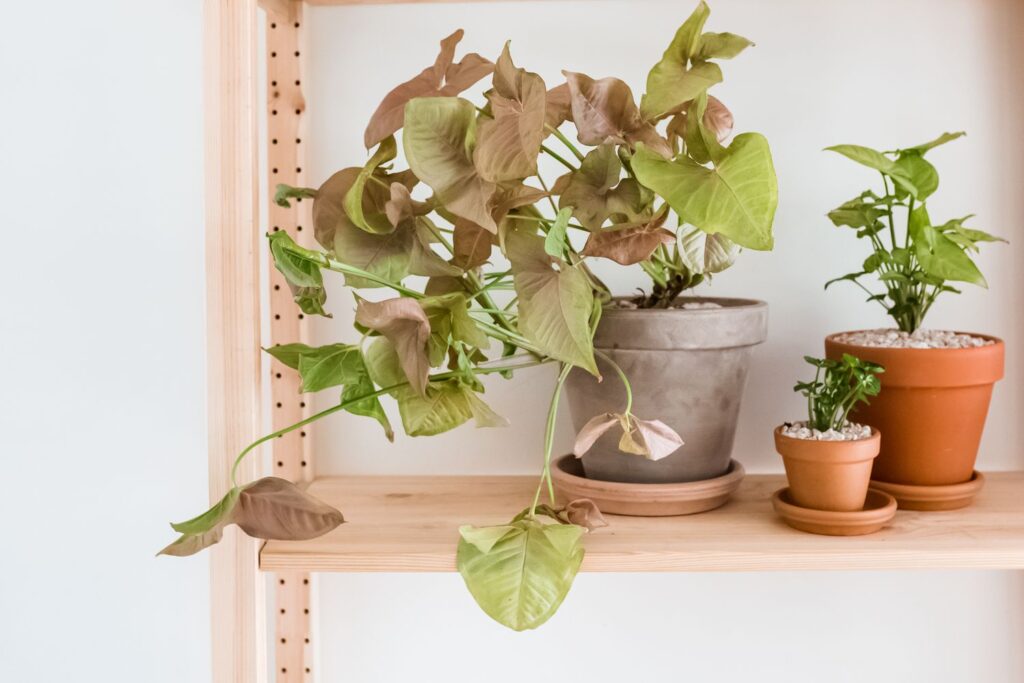
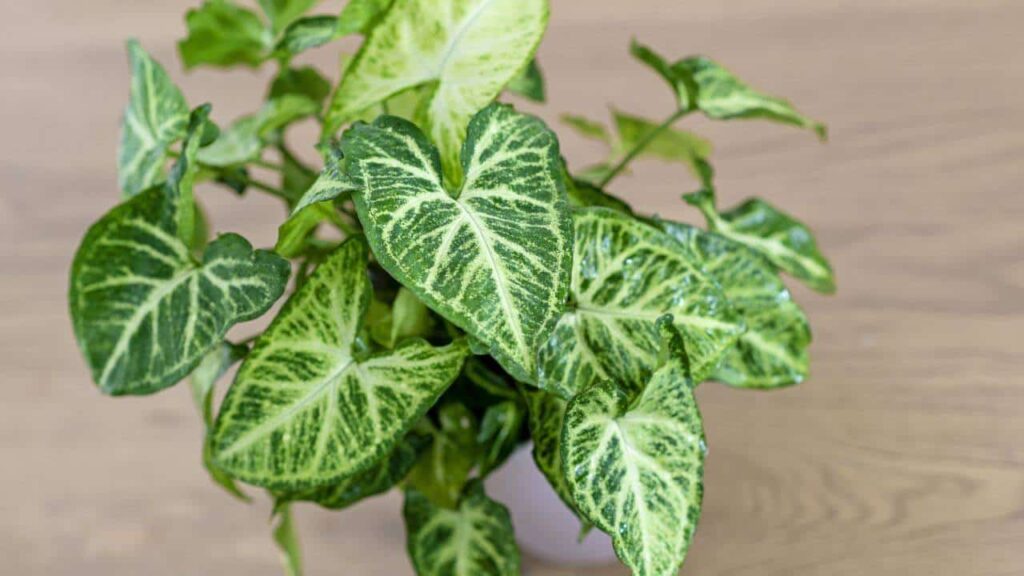
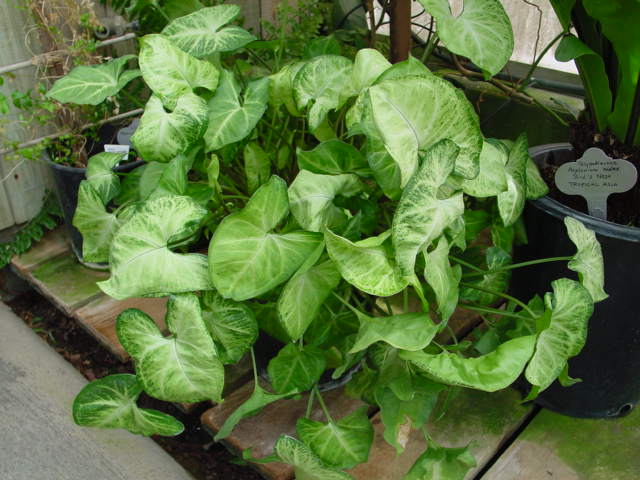
The Arrowhead Vine, scientifically known as Syngonium podophyllum, has become a favorite among indoor gardening enthusiasts for its elegant foliage and ease of care. Its arrow-shaped leaves, lush greenery, and trailing growth habit make it a versatile plant, perfect for shelves, hanging baskets, or tabletop displays. Beyond its aesthetic appeal, the Arrowhead Vine is known for its resilience and adaptability, thriving in a range of indoor environments with proper care. For anyone looking to bring life and vibrancy to their home, understanding the essentials of Arrowhead Vine care is the first step to cultivating a thriving indoor companion.

The Allure of Arrowhead Vine

What sets the Arrowhead Vine apart from other houseplants is its unique combination of beauty and versatility. Its leaves start as delicate arrow shapes and often develop intricate variegation patterns as the plant matures. These patterns can include shades of green, white, pink, or cream, creating a dynamic visual appeal that changes as the plant grows. Unlike many fussy houseplants, Arrowhead Vine adapts easily to indoor conditions, making it suitable for both novice and experienced plant lovers. Its cascading growth habit allows it to spill gracefully from hanging baskets or climb with support, making it an ideal choice for creative indoor arrangements.

In addition to its aesthetic charm, the Arrowhead Vine has a subtle air-purifying quality. Like many tropical plants, it helps filter toxins from the air, contributing to a healthier indoor environment. This combination of beauty, adaptability, and functionality makes the Arrowhead Vine a truly perfect indoor companion.

Ideal Lighting Conditions for Arrowhead Vine

Lighting plays a crucial role in the health and vitality of an Arrowhead Vine. This plant thrives in bright, indirect light, replicating the dappled sunlight it would naturally receive under a tropical forest canopy. Placing the plant near east or north-facing windows usually provides the right balance of light without the risk of scorching its delicate leaves. Direct sunlight, especially from south-facing windows, can cause leaf burn, turning the edges brown and crispy.

Arrowhead Vine can tolerate lower light conditions, though its growth may slow, and the variegation on the leaves might fade. In dimmer rooms, it often develops a richer green coloration, which still enhances its decorative appeal. For spaces lacking natural light, full-spectrum LED grow lights can simulate the sun’s rays, ensuring the plant continues to grow healthily. Observing the plant’s leaf color and growth pattern is the best way to determine if it’s receiving the right amount of light. Pale or stretched-out leaves indicate the need for more light, while scorched tips signal too much direct exposure.

Choosing the Right Soil and Pot

Healthy roots are the foundation of a thriving Arrowhead Vine, making soil choice critical. This plant prefers a well-draining, peat-based potting mix that retains some moisture without becoming waterlogged. A mix that includes perlite or orchid bark helps improve drainage and aeration, preventing root rot—a common issue when the soil remains too wet. Avoid using heavy garden soil, which can compact over time and suffocate the roots.

Container selection is equally important. Pots with drainage holes are essential to allow excess water to escape, preventing the soil from becoming overly saturated. Terracotta pots are an excellent option because they allow the soil to breathe and help regulate moisture levels naturally. While plastic containers are suitable, gardeners should monitor watering more carefully, as plastic retains moisture longer than porous materials. Choosing a pot slightly larger than the plant’s root ball provides room for growth without overwhelming the plant with excess soil that can retain too much water.

Watering Tips for Thriving Growth

Watering is where many indoor gardeners face challenges with Arrowhead Vine. Overwatering can be just as harmful as underwatering, so balance is key. The soil should remain consistently moist but not soggy. During the growing season—spring and summer—watering once or twice a week is usually sufficient, depending on the indoor humidity and temperature. In winter, the plant’s growth slows, and less frequent watering is required.

A practical method is to check the top inch of soil; if it feels dry to the touch, it’s time to water. When watering, aim for a thorough soak rather than light, frequent watering, ensuring the water reaches the roots. Avoid letting the plant sit in standing water, as this can quickly lead to root rot. Maintaining consistent moisture helps the Arrowhead Vine develop lush, vibrant leaves and encourages healthy new growth.

Temperature and Humidity Essentials

The Arrowhead Vine is native to tropical environments, meaning it thrives in warm and moderately humid conditions. Ideal indoor temperatures range from 65 to 80 degrees Fahrenheit. Exposure to drafts, sudden temperature changes, or cold air can stress the plant, resulting in leaf yellowing or slowed growth. Keeping the plant in a stable environment is essential for long-term health.

Humidity is another critical factor. Arrowhead Vine enjoys moderate to high humidity levels, replicating its natural rainforest habitat. Indoor air, especially during winter with heating systems, can be dry, causing the leaves to brown at the edges. Placing a humidifier nearby, grouping plants together, or setting the pot on a tray with water and pebbles can help maintain optimal humidity levels. Regular misting can also provide temporary moisture, but it should not replace consistent environmental humidity.

Pruning and Training for Optimal Shape

Arrowhead Vine grows quickly under the right conditions, and regular pruning is important to maintain its shape and encourage bushier growth. Trimming back long, leggy stems not only keeps the plant aesthetically pleasing but also promotes branching, resulting in a fuller appearance. Pruning is best done with clean, sharp scissors or pruning shears to prevent damaging the plant.

Training the plant can further enhance its decorative appeal. Arrowhead Vine can climb with support, such as a moss pole or trellis, transforming it into a vertical focal point. Alternatively, allowing the vines to trail from a hanging basket creates a cascading, lush effect. Observing the plant’s natural growth tendencies and adjusting pruning and training methods accordingly ensures a healthy and visually striking result.

Common Pests and Diseases

Although Arrowhead Vine is relatively hardy, it is not immune to pests and diseases. Common intruders include spider mites, aphids, and mealybugs, which can damage the leaves and stunt growth. Early detection is key to preventing infestations from spreading. Inspecting leaves regularly, especially the undersides, allows gardeners to catch problems before they escalate.

Natural treatments, such as neem oil or insecticidal soap, can effectively manage minor infestations. Isolating affected plants and maintaining proper watering and humidity levels helps prevent future issues. Fungal infections, often caused by overwatering or poor air circulation, can also occur, leading to root rot or leaf spotting.

Propagation Techniques

One of the most rewarding aspects of growing Arrowhead Vine is its ease of propagation. The plant can be propagated from stem cuttings, allowing gardeners to expand their collection or share with friends. Stem cuttings with at least two nodes are ideal for propagation, placed in water or directly into moist soil. Roots typically begin to develop within a few weeks, and once established, the new plant can be treated like a mature Arrowhead Vine.

Propagation is not only a practical way to multiply the plant but also an opportunity to experiment with placement and design. Young plants can be trained differently from their parent, creating new cascading effects or climbing arrangements that add interest to indoor spaces.

Incorporating Arrowhead Vine into Home Décor

Arrowhead Vine’s versatility makes it an excellent choice for interior design. Its trailing vines can soften the edges of shelves, bookcases, or mantelpieces, while climbing varieties add height and dimension to a room. The plant’s vibrant leaves create a natural focal point, enhancing both modern and traditional interiors.

Pairing Arrowhead Vine with complementary plants can create a lush indoor jungle effect, while placing it in a minimalist container allows its beauty to shine as a singular statement piece.

Seasonal Care and Long-Term Maintenance

Maintaining an Arrowhead Vine throughout the year requires attention to seasonal changes. During spring and summer, the plant is in its active growth phase, requiring more frequent watering, occasional fertilization, and regular pruning. In autumn and winter, growth slows, and care routines should be adjusted accordingly, reducing watering and withholding fertilizer to allow the plant to rest.

Monitoring the plant’s response to changes in light, temperature, and humidity ensures that it remains healthy year-round. By observing subtle signals such as leaf color, texture, and new growth, gardeners can anticipate needs before problems arise, fostering a thriving and visually appealing indoor plant.

Conclusion

The Arrowhead Vine is a remarkable indoor plant that combines elegance, resilience, and versatility. Its arrow-shaped leaves, cascading growth, and subtle air-purifying properties make it an ideal companion for homes of all sizes and styles. By understanding its lighting, soil, watering, temperature, humidity, and propagation needs, gardeners can cultivate a vibrant, healthy plant that flourishes year-round.

Caring for an Arrowhead Vine is both an art and a science, requiring attention to environmental details and an appreciation for its natural growth patterns. Regular pruning, proper training, and thoughtful placement can transform this plant into a living work of art, enhancing any interior space.

Why Keto Plateaus Are More Psychological Than Metabolic

The ketogenic diet, commonly referred to as “keto,” has grown in popularity among athletes across multiple disciplines. Its primary characteristic is a high-fat, moderate-protein, and very low-carbohydrate nutritional profile, typically consisting of less than 50 grams of carbohydrates per day. This macronutrient distribution forces the body into a state called ketosis, where fat becomes the primary fuel source instead of glucose. For athletes, this shift in energy substrate has profound implications, not only on metabolic processes but also on how the nervous system is trained and engaged during exercise.

Under traditional high-carbohydrate diets, athletes rely primarily on glycogen stores in muscles and the liver to fuel high-intensity efforts. Glycogen is easily accessible and can be rapidly metabolized, providing quick bursts of energy essential for explosive movements. However, ketogenic athletes must adapt to a situation where glucose availability is limited. This metabolic shift forces the nervous system to adjust the way it communicates with muscles, as the timing, intensity, and duration of neural signals are closely linked to energy substrate availability. The central nervous system (CNS) relies on glucose as a primary fuel under standard conditions, and keto challenges this reliance, compelling neural pathways to operate efficiently under a different energy regime.

This adaptation is not immediate. Athletes typically experience a transition period known as the “keto-adaptation phase,” which can last anywhere from two to six weeks. During this time, the nervous system experiences reduced excitability, slower reaction times, and altered neurotransmitter activity. Studies have shown that ketone bodies like beta-hydroxybutyrate (BHB) can cross the blood-brain barrier, providing an alternative energy source for neurons. This enables athletes to maintain cognitive function and neural signaling even when glucose is scarce, but the efficiency of neuromuscular coordination may initially decline. The nervous system must effectively recalibrate its response patterns to optimize performance in this new metabolic environment.This recalibration process unfolds gradually, much like fence installation in tennessee, where stability and performance emerge only after careful groundwork, alignment, and time for the structure to properly settle and hold.

Furthermore, keto impacts the balance of key electrolytes such as sodium, potassium, and magnesium, which are crucial for nerve conduction. Low carbohydrate intake increases urinary excretion of these electrolytes, which can lead to temporary reductions in nerve firing efficiency. Athletes on keto often need to implement precise nutritional strategies to maintain optimal neural function, including electrolyte supplementation, hydration, and careful monitoring of macronutrient intake. The combination of metabolic and neural adaptations is what makes training on keto fundamentally different from traditional carbohydrate-based training.

Neural Adaptations to Fat-Dominant Fuel Utilization

Once an athlete has adapted to ketosis, the nervous system begins to exhibit distinct functional changes in response to fat-dominant energy metabolism. Unlike glucose, which provides rapid energy for immediate, high-intensity movements, fat-derived ketones offer a slower but more sustained energy source. This shift has important implications for how motor neurons fire, how muscle fibers are recruited, and how endurance performance is maintained.

The CNS adapts by prioritizing efficiency over speed in neural signal transmission. Since ketones provide a more consistent, albeit slower, supply of energy, the nervous system reduces the frequency of high-intensity signals in favor of steady, prolonged neural output. This translates into enhanced endurance capacity for keto-adapted athletes, as muscles are able to sustain contractions over longer periods without the rapid depletion of glycogen. However, explosive movements requiring maximal motor unit recruitment may be temporarily compromised. Athletes must therefore adjust their training protocols to emphasize lower-intensity endurance work, skill refinement, and pacing strategies that align with their altered neural signaling patterns.

Ketogenic adaptation also affects neurotransmitter synthesis and release. Glutamate and GABA, two neurotransmitters integral to excitatory and inhibitory neural signaling, are influenced by ketone metabolism. Research indicates that beta-hydroxybutyrate can modulate neuronal excitability, potentially reducing excessive firing that could lead to fatigue or neural strain. This modulation helps athletes sustain cognitive and motor performance during prolonged exertion but may also require retraining the nervous system to generate peak power outputs on demand. In other words, the nervous system becomes more “energy-efficient” but less immediately explosive, necessitating specialized training techniques to maintain or restore high-intensity capabilities.This shift toward efficiency mirrors commercial power washing geneva, where sustained performance depends on controlled pressure and technique rather than constant maximum force, requiring adjustment to achieve optimal results without unnecessary strain.

Another critical adaptation involves proprioception and motor learning. The nervous system relies on feedback loops from muscles, joints, and tendons to coordinate movement. Ketosis alters these feedback signals due to changes in energy availability and neurotransmitter function, requiring athletes to recalibrate timing, balance, and muscle activation patterns. This is particularly evident in complex sports that demand precise coordination, such as gymnastics, martial arts, or sprinting. Trainers working with keto-adapted athletes must integrate neuromuscular drills that reinforce motor patterns under fat-fueled conditions, ensuring that both skill execution and endurance are optimized.

Cognitive and Psychological Implications for Nervous System Training

The ketogenic diet does not only affect physical performance—it profoundly influences cognitive processes, which are tightly interlinked with nervous system function. The brain, as the command center for motor control, decision-making, and sensory integration, undergoes adaptive changes when shifting from glucose to ketone metabolism. Ketone bodies offer neuroprotective benefits, enhance mitochondrial efficiency, and stabilize neuronal firing, all of which can improve focus, mental clarity, and cognitive endurance for athletes.

Athletes on keto often report heightened concentration and sustained mental stamina during prolonged training sessions or competitions. This is partly due to the consistent energy supply provided by ketones, which avoids the blood sugar fluctuations common with high-carbohydrate diets. The nervous system benefits from reduced “energy crashes,” enabling more precise motor control and strategic thinking during events that demand both physical and mental acuity. However, the adaptation phase can present cognitive challenges, including decreased reaction speed and reduced attentional flexibility, which must be addressed through targeted neuromotor and cognitive training.

Psychological resilience is another factor influenced by keto-related nervous system adaptations. Transitioning to a fat-fueled metabolic state can initially cause fatigue, irritability, and perceived exertion spikes. These experiences require athletes to engage mental control strategies that strengthen central nervous system endurance, teaching the brain to tolerate prolonged stress without relying on rapid glucose availability. Techniques such as mindfulness, mental rehearsal, and neurofeedback can complement physical training, ensuring that nervous system adaptations support both performance and overall well-being.Over time, this mental fortification functions much like house windows new jersey, strengthening the boundary between internal stability and external stress while still allowing clarity, focus, and adaptability to pass through.

Training Strategies Tailored for Keto Athletes

Given the unique metabolic and neural adaptations associated with ketogenic diets, traditional training protocols often require significant modification. High-intensity interval training (HIIT), sprint work, and powerlifting, which depend heavily on rapid glycogen metabolism, must be carefully periodized for keto athletes. Instead of focusing exclusively on maximal output, coaches emphasize sustained, fat-adapted performance, strategic energy utilization, and neuromuscular efficiency.

Endurance sessions are particularly effective for reinforcing nervous system adaptations under fat-dominant conditions. Long-distance running, cycling, or swimming at submaximal intensities encourages the nervous system to optimize motor unit recruitment patterns for prolonged performance. This training enhances synaptic efficiency and stabilizes neural firing rates, allowing athletes to maintain coordination, balance, and timing even when glycogen is low. By integrating these sessions with strength and skill-specific drills, coaches can ensure that both endurance and neuromuscular capabilities develop in harmony.This coordinated development resembles legal document signing, where precision, consistency, and alignment of all components are essential to validate and sustain a strong, reliable outcome.

Neuromotor exercises also play a crucial role in ketogenic training strategies. Drills that emphasize proprioception, reaction time, and precise movement patterns help retrain neural circuits that may have slowed during the adaptation phase. Plyometric exercises, balance training, and complex skill sequences are adjusted to account for the nervous system’s altered energy dynamics. This ensures that athletes retain explosive capacity and technical proficiency while benefiting from fat-adapted endurance.

Recovery and nervous system maintenance are equally critical. Keto athletes often require higher electrolyte intake, targeted supplementation, and strategic carbohydrate cycling to support neural function during periods of peak stress. Sleep quality, stress management, and active recovery techniques such as yoga or mobility work are also essential, as they help stabilize neurotransmitter function and autonomic balance. By treating the nervous system as both a performance driver and a recovery priority, coaches can maximize the benefits of ketogenic adaptation while mitigating potential downsides.This integrated recovery approach parallels manual therapy in Chicago, where addressing tension, alignment, and balance in a coordinated way helps restore function and sustain long-term performance.

Conclusion: Integrating Nervous System Training into Keto Athletic Performance

The ketogenic diet represents a profound shift in the way athletes fuel their bodies, and this shift naturally extends to how the nervous system functions and is trained. From the initial adaptation phase to long-term keto performance, the nervous system must recalibrate to efficiently utilize ketones, optimize neurotransmitter activity, and maintain precise motor control under altered energy conditions. These adaptations influence endurance, explosive power, cognitive performance, and psychological resilience, creating a distinct set of training requirements for keto athletes.

Effective training strategies for ketogenic athletes involve a combination of endurance-focused work, neuromotor drills, cognitive conditioning, and careful recovery management. Attention to electrolytes, hydration, and nutrient timing supports nervous system function, while individualized monitoring ensures that adaptations progress safely and effectively. By integrating these approaches, athletes can harness the full benefits of ketogenic metabolism while maintaining high levels of performance across physical and mental domains.

Ultimately, the intersection of keto and nervous system training illustrates a broader principle of athletic performance: energy availability, neural efficiency, and skill execution are inextricably linked. Athletes who understand and leverage these connections can optimize their training, achieve greater resilience, and sustain competitive performance in ways that traditional high-carbohydrate strategies may not offer. The ketogenic diet is more than a nutritional choice—it is a catalyst for a fundamentally different approach to nervous system training, one that challenges conventional paradigms and opens new frontiers in human performance.

Why Athletes on Keto Train Their Nervous System Differently

The ketogenic diet, characterized by high fat, moderate protein, and very low carbohydrate intake, has gained immense popularity in recent years due to its promises of rapid weight loss, improved mental clarity, and metabolic benefits. Yet, among practitioners, the phenomenon of the “keto plateau” has emerged as a frequent concern. A keto plateau refers to a period during which an individual’s weight loss stagnates despite continued adherence to the diet. Many assume that these plateaus are strictly metabolic, implying that the body’s fat-burning mechanisms have slowed or adapted in a way that prevents further progress. While metabolic adaptations do play a role, mounting evidence and real-world experiences suggest that the psychological components of plateaus are often far more significant than the metabolic ones.

When someone first adopts a ketogenic diet, the body experiences rapid initial weight loss. Much of this early loss is water weight as glycogen stores deplete. Glycogen binds water at a ratio of approximately 3-4 grams of water per gram of glycogen, so when carbohydrate intake plummets, the body sheds water quickly. This rapid reduction can create an illusion of effortless fat loss, establishing high expectations for continued results. When the pace of weight loss inevitably slows, individuals may perceive this as a metabolic plateau, even if they are still losing fat at a steady, healthy rate. Psychologically, the discrepancy between expectation and reality triggers frustration and doubt, making it feel as though progress has completely stalled.

Moreover, the brain’s reward system plays a critical role. Weight loss is often accompanied by reinforcement—compliments from others, tangible changes in body measurements, or satisfaction in personal milestones. When progress slows, these reinforcements diminish, and the brain may interpret this plateau as failure. Studies in behavioral psychology suggest that perceived lack of progress can actually undermine motivation and adherence, which in turn may subtly alter behavior in ways that contribute to the plateau, such as slipping on macronutrient targets, underestimating calorie intake, or overestimating physical activity. Therefore, what appears to be a purely metabolic slowdown is often a complex interaction of expectation, perception, and behavioral adjustments.

Understanding this distinction is crucial because it reframes how individuals approach keto plateaus. Instead of immediately seeking extreme interventions like prolonged fasting, unsustainable calorie restrictions, or drastic increases in exercise—which may temporarily mask the psychological aspect but are often counterproductive—recognizing the role of mindset, patience, and consistency becomes essential. Awareness of psychological influences allows individuals to maintain adherence and approach the plateau with realistic expectations, reducing stress and preventing disordered patterns that could undermine long-term success.In this way, managing expectations functions much like solar screens prosper tx, filtering intensity and excess pressure so progress can continue steadily without overheating motivation or confidence.

The Psychological Mechanisms Behind Perceived Plateaus

The experience of a keto plateau is heavily influenced by cognitive biases and emotional responses that accompany weight loss journeys. Humans are naturally inclined to notice progress and setbacks in highly emotional contexts, especially when it involves body image, health, and personal effort. One of the most prominent psychological mechanisms at play is the expectation-reality gap, which occurs when individuals anticipate rapid or linear results and encounter a slower, more variable pattern. On a ketogenic diet, initial water-weight loss can create a misleading sense of speed, and when fat loss continues at a steady but slower rate, it often triggers the perception of stagnation.

Confirmation bias also plays a role. People may focus disproportionately on instances when the scale does not move, while discounting subtle but meaningful changes in body composition, energy levels, or metabolic health. This selective attention can amplify feelings of frustration, making the plateau feel more significant than it is. In fact, many individuals on keto continue to lose visceral fat and inches from their waistline even when the scale appears static. By focusing solely on weight as the metric of success, people often misinterpret ongoing progress, reinforcing the psychological rather than metabolic nature of the plateau.Reframing progress in this broader way is similar to aluminum pergolas north dakota, where strength and value come from the underlying structure, not just the most visible surface features.

Another key factor is stress and emotional regulation. Sustained dietary restriction, even in the context of a low-carb, high-fat diet, imposes stress on the body and mind. Cortisol, the primary stress hormone, can influence water retention, appetite regulation, and metabolic efficiency, subtly affecting weight trends. While these changes are physiological, their effects are often minor compared to the psychological response to perceived failure. Increased stress can lead to emotional eating, minor deviations from the diet, or hyperawareness of small fluctuations, all of which contribute to the perception of a plateau. Essentially, the psychological component amplifies minor physiological fluctuations, creating a feedback loop that can make it seem like fat loss has completely halted.

Moreover, social comparison intensifies this effect. Exposure to social media, online forums, and friends’ weight loss narratives can distort perceptions of personal progress. If an individual perceives themselves as lagging behind others who are experiencing rapid, visible changes, the plateau feels more frustrating and discouraging. This emotional strain can influence behavior, leading to diet fatigue, increased anxiety, and even a temporary decrease in adherence, which further reinforces the sense of stagnation. Thus, the psychological mechanisms underlying keto plateaus are multidimensional, including expectation management, selective attention, emotional regulation, and social influence.Addressing these distorted perceptions benefits from an approach akin to price transparency solutions, where clear, contextualized information replaces assumptions, helping individuals evaluate progress more accurately and reduce unnecessary frustration.

Strategies to Overcome Psychological Plateaus

Recognizing the psychological nature of keto plateaus allows individuals to adopt strategies that address mindset, perception, and behavior rather than relying solely on drastic dietary adjustments. One of the most effective strategies is to shift focus from scale weight to other markers of progress, including body measurements, clothing fit, energy levels, and performance metrics. Tracking waist circumference, fat percentage, or improvements in exercise capacity provides tangible evidence that fat loss continues even when scale readings fluctuate.

Another approach is to normalize the experience of plateaus by understanding that weight loss is inherently non-linear. Biological systems fluctuate daily due to water balance, hormonal changes, and digestive processes. Adopting a broader perspective—such as evaluating trends over weeks rather than days—reduces anxiety and prevents reactionary behaviors that undermine consistency. Cognitive reframing techniques from behavioral psychology, including mindfulness, journaling, and positive self-talk, can also help individuals reduce stress and maintain motivation, mitigating the psychological amplification of minor weight fluctuations.Organizing these varied indicators of progress is much like working with a document scanning company, where scattered data is systematically captured, structured, and reviewed to reveal clear patterns that are not immediately visible at a glance.

In addition, reviewing adherence without judgment is crucial. Minor deviations in carbohydrate intake, hidden calories from sauces or condiments, and untracked snacking can subtly slow fat loss. Addressing these behaviors with awareness, rather than self-criticism, reinforces a sense of control and agency. Strategies such as meal planning, tracking macronutrients, and preparing ketogenic-friendly snacks support adherence while minimizing the risk of perceiving minor slips as catastrophic setbacks.

Social and environmental support further enhances resilience during plateaus. Engaging with like-minded communities, sharing experiences, and celebrating non-scale victories reinforces progress and counters feelings of isolation. Many individuals find that reframing plateaus as an opportunity for reflection, learning, and habit reinforcement transforms them from demotivating obstacles into catalysts for long-term success.

Lastly, maintaining flexibility is key. Some individuals strategically implement targeted carb refeeding or caloric cycling to reset energy balance and provide psychological relief, though these interventions are often more about mental rejuvenation than metabolic necessity. By acknowledging the psychological component, these techniques become tools for mindset management rather than desperation measures, allowing adherence to continue in a balanced, sustainable way.Viewed this way, navigating a plateau becomes a unique puzzle, where progress emerges from fitting together mindset, patience, and strategic flexibility rather than forcing a single rigid solution.

Conclusion: Mind Over Metabolism

Keto plateaus are frequently perceived as metabolic roadblocks, yet a careful examination reveals that the mind is often the true barrier to continued fat loss. Psychological factors—expectation gaps, cognitive biases, emotional responses, and social influence—amplify minor physiological fluctuations and create the perception of stagnation. While metabolic adaptation exists, it is generally modest and easily managed through consistent adherence and lifestyle strategies.

Recognizing the psychological nature of plateaus empowers individuals to approach them with patience, clarity, and strategic focus. Shifting attention from the scale to holistic markers of progress, adopting non-linear thinking about weight loss, and utilizing behavioral techniques can transform perceived plateaus into opportunities for reinforcement and growth. By prioritizing mindset and consistency, keto practitioners can continue to achieve meaningful, sustainable results without succumbing to frustration or misguided interventions.

In the end, the evolution of weight loss on the ketogenic diet underscores a fundamental truth: success is not dictated solely by biochemistry but by the interplay of physiology and psychology. Those who navigate plateaus with awareness, resilience, and informed strategy are best positioned to sustain fat loss, maintain adherence, and achieve their long-term goals. Understanding that the plateau exists more in perception than metabolism is the key to unlocking continued progress and transforming the keto journey from a series of obstacles into a sustainable path toward health, vitality, and confidence.

How to Create a Thriving Mexican Cactus Garden in Small Spaces

Creating a thriving Mexican cactus garden in small spaces is not only possible, but it can also transform even the tiniest balcony, patio, or corner of your home into a vibrant, living desert oasis. Mexican cacti, with their striking shapes, rich textures, and often unexpected bursts of color, bring a sense of rugged beauty and resilience to any environment. Unlike traditional houseplants that demand constant attention, cacti are low-maintenance yet extraordinarily rewarding, making them perfect for small-space gardening.

The key to success lies in understanding the unique needs of Mexican cacti and designing a space that complements their natural growth habits. While the idea of cultivating a desert environment indoors or in a compact urban area may seem challenging at first, it becomes manageable once you embrace the principles of light, soil, water, and arrangement. These elements form the foundation of a thriving cactus garden that is both functional and visually stunning.

Choosing the Right Mexican Cactus Varieties

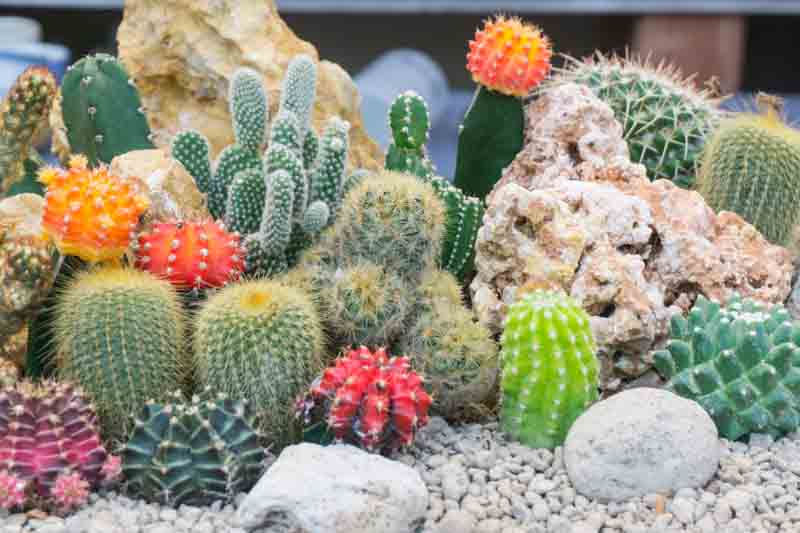
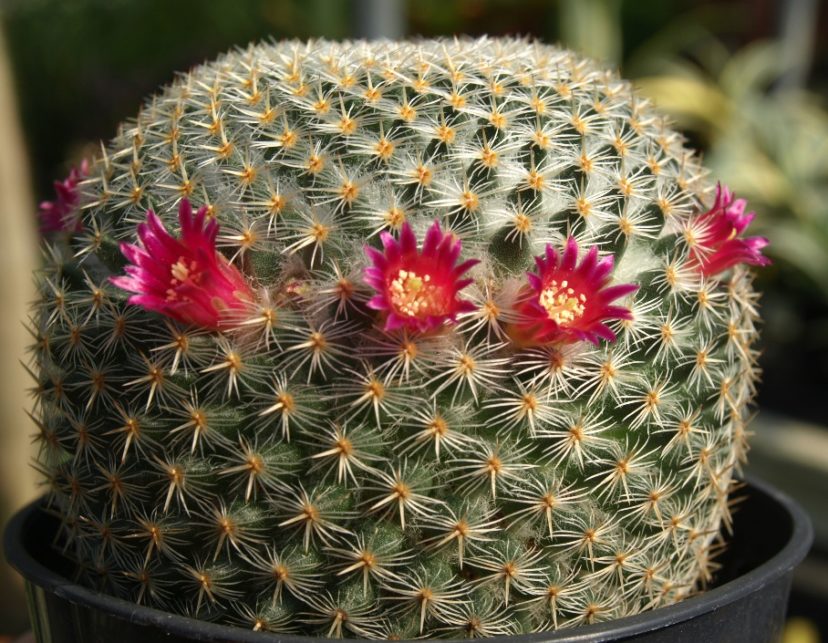
When working with limited space, selecting the right cactus species is critical. Mexican cacti vary widely in size, shape, and growth patterns, and choosing varieties that suit your available space ensures a flourishing garden. Small columnar types, such as the Mexican Fence Post Cactus or the Cereus peruvianus, are excellent choices for vertical accents. Their tall, slender forms allow for visual impact without taking up too much horizontal room. Meanwhile, smaller round cacti, like the Golden Barrel or Echinocactus grusonii, provide a contrasting texture that softens the visual rhythm of the garden.

For a more dynamic look, you can incorporate trailing cacti, such as the Rhipsalis species, which cascade gracefully over pots or shelves. These cacti are particularly effective in apartments or small patios, as they make use of vertical and hanging spaces, giving the illusion of a larger, more expansive garden. Understanding the mature size of each cactus is essential; overcrowding can stunt growth and create an environment more susceptible to pests and disease.

Maximizing Light in Small Spaces

Light is arguably the most crucial factor for Mexican cacti. In their natural habitat, these plants thrive under bright, direct sunlight, and even a few hours of shade can dramatically affect their health. In small spaces, finding the right balance of light requires a mix of strategy and creativity. South-facing windows are ideal for indoor cactus gardens, offering the most consistent and intense sunlight throughout the day. If your space lacks natural light, consider using full-spectrum grow lights to replicate the sun’s rays. Position the cacti close to the light source, but be mindful of overheating or sunburn, which can occur if the light is too intense or too close for prolonged periods.

Outdoor small spaces, such as balconies or terraces, can also be optimized by using reflective surfaces. Light-colored walls or mirrors can amplify sunlight, providing a brighter microenvironment for your cacti. Rotating the plants occasionally ensures even exposure, preventing uneven growth and leaning.

Soil and Drainage: The Foundation of Healthy Cacti

Healthy cacti begin with the right soil and drainage. Unlike typical houseplants, Mexican cacti require well-draining soil that prevents water from pooling around their roots. A compacted or overly moist substrate can quickly lead to root rot, which is often fatal. For small-space gardening, specialized cactus or succulent mixes are ideal. These blends typically include sand, perlite, and gravel, which create a gritty, porous medium that mimics desert soil.

If you prefer to create your own mix, combine regular potting soil with coarse sand and perlite in equal parts. This combination ensures that excess water drains quickly while retaining enough moisture for the cactus to absorb what it needs. Using pots with drainage holes is non-negotiable. In small spaces where you might be tempted to use decorative containers without holes, consider adding a layer of gravel at the bottom or drilling discreet drainage holes to maintain a healthy root system.

Watering Techniques for Small Gardens

Watering is another area where small-space gardeners often struggle. Overwatering is the most common mistake and can destroy a cactus faster than neglect. Mexican cacti are adapted to survive in arid conditions and store water in their thick, fleshy tissues. The key is to allow the soil to dry completely between watering. Depending on the season, this could mean watering as infrequently as once every two to three weeks during the growing season and even less in winter.

Observe your cacti closely; shriveled or soft tissue can indicate underwatering, while yellowing or mushy stems usually signal overwatering. Using a watering can with a narrow spout allows for precise application, ensuring water reaches the roots without splashing onto the plant body, which can cause rot. Small-space gardeners often face limited airflow, making it essential to monitor humidity levels, as high humidity combined with excess water can create an environment ripe for fungal infections.

Strategic Arrangement and Vertical Gardening

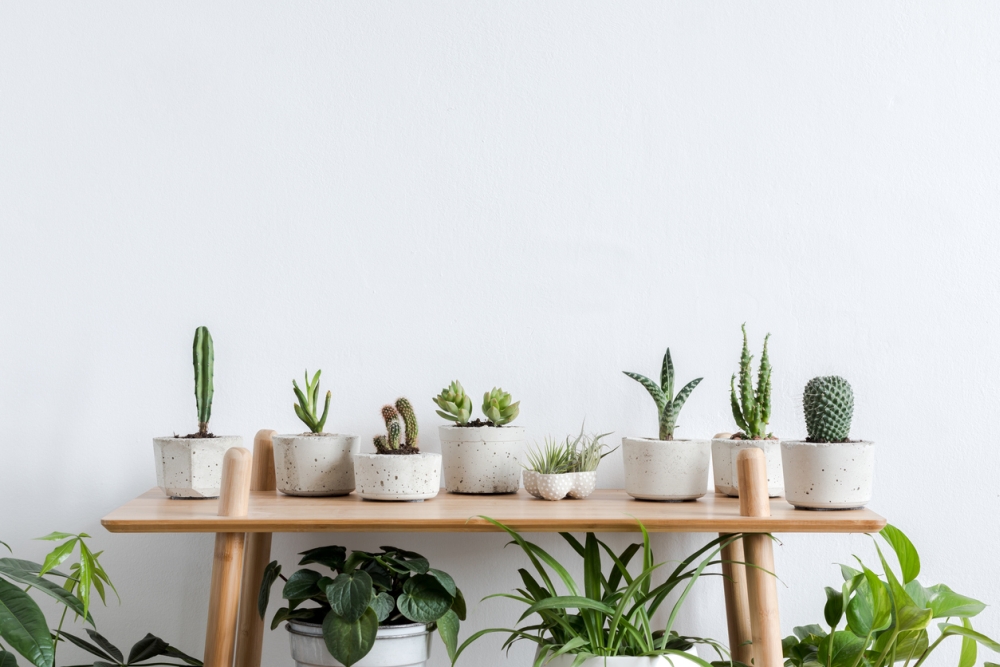
Arranging your Mexican cacti creatively can make a small space feel much larger. Play with height, texture, and color to create a visually engaging miniature desert landscape. Taller cacti can be positioned at the back or in corners to form natural focal points, while smaller cacti can be grouped in clusters to add density and depth. Placing trailing species along shelves, hanging baskets, or wall-mounted planters introduces movement and a sense of lushness without consuming floor space.

Vertical gardening is particularly effective for compact areas. Consider installing tiered shelves, stacked planters, or even repurposed wooden ladders to maximize vertical real estate. The variety in shapes and sizes, combined with creative elevation, gives the illusion of a more expansive garden while keeping maintenance manageable.

Fertilizing and Seasonal Care

While Mexican cacti are hardy, they benefit from occasional fertilization, especially in small-space gardens where natural soil nutrients are limited. Use a balanced, low-nitrogen fertilizer formulated for cacti and succulents. Fertilize during the growing season, typically spring and summer, and avoid feeding during dormancy in the colder months. Over-fertilizing can lead to rapid, weak growth that is more vulnerable to pests and disease, so moderation is key.

Seasonal care is equally important. Even indoor cacti are affected by changes in temperature and light. During winter, reduce watering and consider moving pots to sunnier spots to compensate for shorter daylight hours. For outdoor spaces, protect your cacti from unexpected frost or heavy rains by using portable covers or moving them into sheltered areas.

Dealing with Pests and Disease in Confined Spaces

Small-space gardens can be more susceptible to pests because plants are in close proximity, creating ideal conditions for infestations. Mealybugs, spider mites, and scale insects are the most common problems for Mexican cacti. Regular inspection is essential; look for tiny cotton-like clusters, webbing, or discolored spots on stems. Prompt action can prevent a minor issue from becoming catastrophic. Organic remedies such as neem oil, rubbing alcohol swabs, or insecticidal soaps are effective and safe for confined spaces.

Fungal and bacterial infections can also occur if ventilation is poor. Ensuring adequate airflow around your cacti, even in tight quarters, reduces the likelihood of mold or rot. Placing plants near open windows or using small fans can make a noticeable difference in the overall health of your garden.

Adding Aesthetic and Functional Touches

Creating a thriving Mexican cactus garden isn’t just about survival—it’s about creating a space that inspires joy and reflection. Decorative elements such as colorful stones, terracotta pots, or rustic wooden trays can complement the cacti and enhance visual appeal. Combining different textures, from spiky stems to soft moss or pebbles, adds dimension and keeps the eye engaged.

Lighting also plays a role in the ambiance. If natural light is limited, subtle LED or string lights can highlight your cacti, creating a warm, inviting atmosphere in the evenings. Small fountains or reflective surfaces can simulate the tranquility of a desert oasis, providing both aesthetic and emotional enrichment in confined urban spaces.

The Emotional Rewards of Small-Space Cactus Gardening

There is something profoundly satisfying about cultivating a cactus garden in a limited area. The process encourages mindfulness, patience, and attention to detail. Watching a tiny seedling mature into a towering columnar cactus or seeing a bud bloom into a vibrant flower offers a unique sense of accomplishment. Mexican cacti are resilient, much like the gardeners who nurture them, and this resilience becomes a metaphorical reminder of growth, perseverance, and the beauty of life’s slow processes.

For city dwellers or anyone with limited outdoor space, a well-planned cactus garden is a daily connection to nature, offering an escape from concrete landscapes and screen-filled environments.

Conclusion: Thriving in Small Spaces

Creating a thriving Mexican cactus garden in small spaces is a journey of observation, creativity, and patience. By carefully selecting species, optimizing light, ensuring proper soil and drainage, practicing mindful watering, and arranging your plants thoughtfully, even the smallest balcony or windowsill can become a flourishing desert retreat. Beyond its aesthetic appeal, this type of garden fosters mindfulness, satisfaction, and a deeper connection with nature’s resilience.

A small-space cactus garden proves that size does not limit beauty or abundance. With thoughtful care and a bit of imagination, you can cultivate a miniature Mexican desert that thrives year-round, offering both visual delight and personal fulfillment.

From Watering to Humidity: Mastering the Care of Boston Ferns Indoors

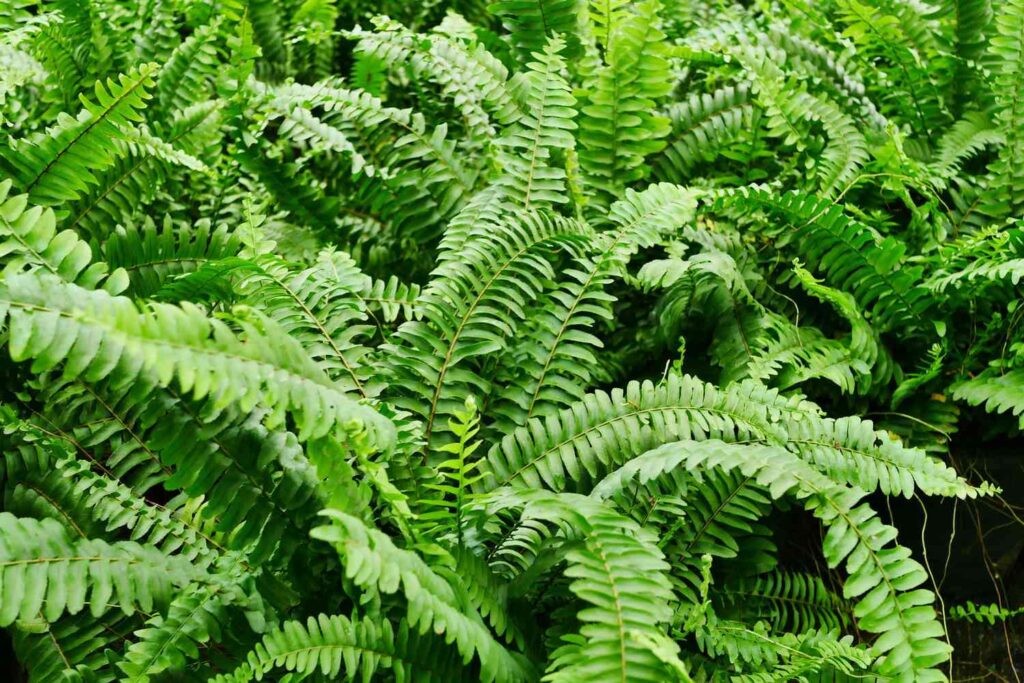
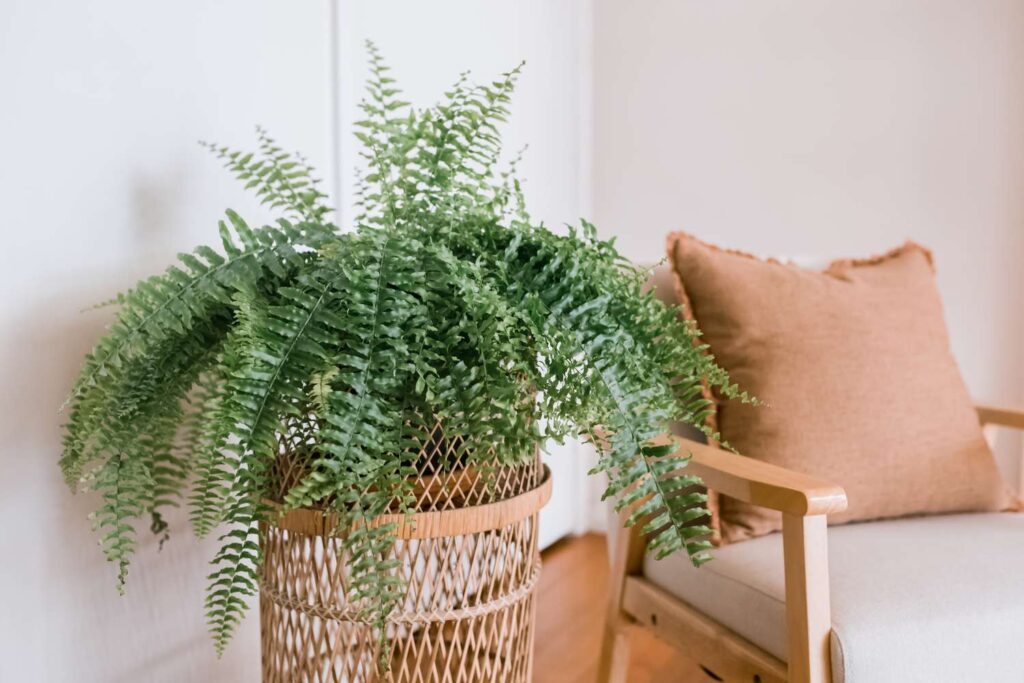
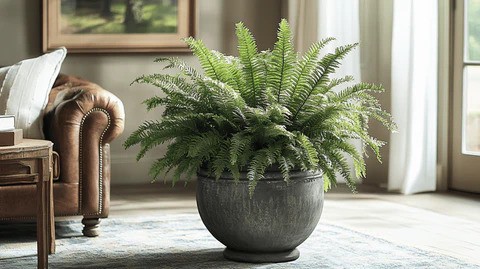
Boston ferns have long held a special place in the hearts of indoor plant enthusiasts, and it’s easy to see why. Their lush, arching fronds evoke the serene charm of shaded forests, while their vibrant greenery brings a sense of calm and freshness to any room. However, anyone who has attempted to grow a Boston fern indoors knows that these plants can be notoriously sensitive. Unlike hardy succulents or resilient pothos, Boston ferns demand a careful balance of water, humidity, light, and temperature. Mastering these elements is essential not only for survival but for creating a fern that thrives and becomes a centerpiece of your home.

Understanding the Boston Fern’s Natural Habitat

To truly care for a Boston fern indoors, it helps to understand where it comes from. Native to tropical and subtropical regions, Boston ferns are accustomed to humid environments with consistent moisture and filtered sunlight. In their natural habitats, they grow under the canopy of larger plants, protected from harsh direct sun while benefiting from consistent humidity and nutrient-rich soil. Bringing these conditions indoors requires a thoughtful approach, as your living room or kitchen rarely mirrors the gentle rainforest environment that Boston ferns prefer. Recognizing this is the first step in providing the care your fern craves.

Watering: More Than Just Keeping Soil Moist

Watering a Boston fern is deceptively simple to understand but challenging to perfect. These plants thrive in consistently moist soil, yet they are highly susceptible to root rot if overwatered. The trick lies in reading the soil and the fronds. A fern that is thirsty will show it by drooping, curling fronds that lack their usual vibrant green sheen. Conversely, yellowing fronds or a foul smell from the soil often signal overwatering. Indoor ferns usually require water more frequently than other houseplants because the enclosed air can dry out soil faster. Most growers find that watering two to three times a week is sufficient, but this depends heavily on indoor temperature, pot size, and the type of soil used.

The method of watering also matters. Pouring water directly over the soil until it runs from the drainage hole ensures deep hydration, encouraging roots to grow downward rather than staying shallow. Misting is often recommended, but it should complement, not replace, proper soil watering. A fine mist can temporarily increase humidity around the fronds, but it doesn’t reach the roots, which ultimately need consistent moisture.

Humidity: The Hidden Key to Lush Fronds

Humidity is perhaps the most overlooked factor in caring for Boston ferns indoors. Because these plants evolved in high-humidity environments, they struggle when indoor air is dry, particularly in winter months when heaters are running. Low humidity can cause fronds to brown at the tips or curl inwards, leaving the plant looking withered and stressed. Ideal humidity for a Boston fern hovers around 50 to 70 percent, which is far higher than what most homes naturally provide.

To recreate this environment, plant lovers have several strategies. Grouping plants together can create a microclimate with slightly higher humidity, as moisture released from one plant benefits nearby neighbors. Humidifiers are another reliable option, especially for winter months or drier climates. Even simple solutions, like placing the fern’s pot on a tray filled with water and pebbles, can help. The water evaporates, increasing humidity around the plant without the risk of overwatering the roots. Consistency is key; short bursts of misting are helpful, but long-term humidity maintenance ensures the fern thrives.

Choosing the Right Light

Light is another critical component that often determines whether a Boston fern flourishes or falters. These ferns do best in bright, indirect light. Direct sunlight can scorch their delicate fronds, while too little light will stunt growth and cause fronds to yellow. East- or north-facing windows usually provide an ideal balance, offering bright morning light without the intensity of afternoon sun. For rooms with limited natural light, fluorescent or LED grow lights can supplement sunlight effectively, giving the fern enough energy to maintain its lush appearance. Observing your plant over time is essential; fronds leaning toward the light or losing vibrancy are signs that an adjustment in placement is needed.

Soil and Pot Considerations

The right soil and container play a surprisingly large role in a Boston fern’s well-being. These ferns prefer a rich, well-draining soil that retains moisture without becoming waterlogged. A peat-based potting mix with added perlite or sand ensures proper drainage and aeration. Using a pot with drainage holes is non-negotiable; stagnant water can quickly lead to root rot, undoing all the care you’ve given the plant. Pot size also matters—too large, and the soil retains excess water, too small, and the roots may become cramped and stressed. Repotting every couple of years helps refresh the soil, remove dead roots, and encourage healthy growth.

Fertilizing Without Overdoing It

Boston ferns benefit from regular feeding during their growing season, which typically spans spring and summer. A balanced, water-soluble fertilizer diluted to half strength works best. Overfertilizing can cause frond burn or unnatural growth, so moderation is essential. Many indoor gardeners find success feeding every four to six weeks, allowing the fern to absorb nutrients gradually while avoiding stress. In fall and winter, when growth naturally slows, reducing or pausing fertilization helps the plant maintain its energy reserves without overstimulation.

Temperature and Airflow

Temperature plays a subtle yet significant role in the health of a Boston fern. These ferns prefer moderate temperatures, ideally between 65 and 75 degrees Fahrenheit during the day and slightly cooler at night. Sudden temperature fluctuations or cold drafts can shock the plant, leading to frond drop or slowed growth. Equally important is gentle airflow. While ferns dislike wind or strong drafts, stagnant air can increase the risk of fungal problems. Striking a balance with good indoor ventilation ensures the fern can breathe while maintaining the cozy environment it prefers.

Pruning and Maintaining Appearance

Pruning is an essential aspect of Boston fern care that is often underestimated. Removing dead or yellowing fronds not only improves the plant’s appearance but also encourages new growth. Trim fronds close to the base using clean, sharp scissors, avoiding damage to surrounding healthy foliage. Regular maintenance also includes gently brushing off dust, which can accumulate on fronds and reduce photosynthesis. For ferns in higher humidity, be mindful of fungal growth on fronds and stems, addressing it early with careful cleaning or natural remedies.

Common Problems and How to Address Them

Even with careful attention to water, humidity, and light, Boston ferns can experience challenges. Browning tips often indicate inconsistent watering or low humidity. Yellow fronds may signal overwatering, nutrient imbalance, or insufficient light. Pests, while less common indoors, can appear in the form of scale, mealybugs, or spider mites. Early detection is crucial—inspect the undersides of fronds regularly and treat infestations with gentle methods such as neem oil or insecticidal soap. Understanding these warning signs and acting promptly ensures your fern remains vibrant and healthy.

The Emotional and Aesthetic Benefits

Caring for a Boston fern is not merely a horticultural exercise—it can be deeply rewarding on a personal and aesthetic level. The sight of gently arching, verdant fronds brings a calming presence to indoor spaces, while the act of nurturing the plant fosters mindfulness and patience. Boston ferns also contribute to indoor air quality, filtering pollutants and increasing oxygen levels, creating a healthier and more inviting home environment. Their presence reminds us of the natural world, offering a small but meaningful connection to greenery even in urban apartments or offices.

Conclusion: A Living Masterpiece

Mastering the care of Boston ferns indoors requires attention, patience, and a willingness to observe and respond to the plant’s needs. From precise watering routines to maintaining the right humidity, balancing light exposure, and providing nutrients, each element contributes to a flourishing fern that is both beautiful and resilient. These plants reward dedication with lush, cascading fronds that enhance any space and provide a quiet sense of satisfaction to their caretakers. By understanding their natural preferences and committing to consistent care, anyone can transform a simple Boston fern into a thriving indoor masterpiece, bringing the calm and beauty of nature into the heart of the home.

Indoor Air Quality and Nerve Plants: How Fittonia Can Improve Your Home Environment

Understanding the Nerve Plant and Its Unique Appeal

Indoor plants have a remarkable way of transforming our living spaces, both aesthetically and environmentally. Among the most captivating options for home gardeners is the Nerve Plant, scientifically known as Fittonia. Renowned for its strikingly patterned leaves, which resemble delicate veins running across a tapestry of green, pink, or red, the Nerve Plant is not just a visual delight. Beyond its ornamental charm, it has been increasingly recognized for its role in improving indoor air quality, making it a perfect companion for modern homes that value both beauty and wellness.

The allure of the Nerve Plant lies in its delicate appearance combined with an impressive adaptability to indoor environments. Unlike more demanding plants that require intense sunlight or meticulous care, Fittonia thrives in moderate light and tolerates lower humidity levels, though it truly flourishes when provided the right balance of moisture and warmth. Its compact size and low growth habit make it ideal for terrariums, tabletops, and shelves, where it can serve as a living accent that draws the eye and uplifts the space.

How Nerve Plants Enhance Indoor Air Quality

The connection between indoor plants and air purification has been widely studied, and Nerve Plants play a subtle yet significant role in this regard. Like many houseplants, Fittonia engages in photosynthesis, absorbing carbon dioxide and releasing oxygen. But it also contributes to indoor air health in less obvious ways. Its leaves can trap dust particles, while the soil and root system support the growth of beneficial microbes that can reduce airborne pollutants. In spaces where dust, volatile organic compounds, and other contaminants accumulate, a collection of Nerve Plants can help to create a fresher, more breathable environment.

For those concerned with indoor air quality, incorporating plants like Fittonia is a natural, low-maintenance approach that complements modern air filtration systems. Unlike artificial purifiers, plants work silently and continuously, offering not only functional benefits but also a psychological boost. Studies have shown that caring for indoor plants can reduce stress and improve mood, an effect that is enhanced by the tactile engagement of watering and nurturing them. The Nerve Plant’s vibrant foliage, in particular, has been associated with feelings of calm and relaxation, making it a dual-purpose ally in improving both the physical and emotional atmosphere of a home.

Choosing the Right Location in Your Home

When it comes to growing Nerve Plants at home, light is one of the most crucial factors. Fittonia thrives in bright, indirect light, though it can tolerate low-light conditions for short periods. Direct sunlight should be avoided, as the delicate leaves can scorch easily. A north-facing window or a spot slightly away from an east or west-facing window often provides the ideal lighting conditions. If natural light is insufficient, fluorescent or LED grow lights can supplement the plant’s needs, ensuring steady growth and vibrant leaf coloration.

Humidity is another essential consideration. While Fittonia can survive in standard indoor humidity, it flourishes in more humid environments. Bathrooms, kitchens, or areas near humidifiers are excellent spots for cultivating these plants. For drier environments, occasional misting or the use of pebble trays with water can help maintain the necessary moisture levels without overwhelming the roots. Choosing the right location is not only about survival but about encouraging the plant to contribute fully to indoor air quality by maintaining healthy foliage.

Soil, Watering, and Maintenance Tips

The foundation of any thriving indoor plant lies in the soil. Fittonia prefers a well-draining, peat-based potting mix that retains some moisture without becoming soggy. A combination of peat moss, perlite, and standard potting soil often works best. The balance of aeration and moisture retention is vital to prevent root rot, which is a common problem in overwatered Nerve Plants.

Watering Fittonia requires a gentle, attentive approach. Unlike many succulents that can endure neglect, Nerve Plants prefer consistently moist soil, though not waterlogged. The leaves often serve as a natural indicator; when they begin to droop slightly, it is usually a sign the plant needs water. Regular, moderate watering encourages robust growth and maintains the plant’s signature lush foliage. Seasonal adjustments are necessary, with more frequent watering during warmer months and reduced watering during cooler periods when the plant’s growth naturally slows.

Fertilization supports both aesthetic and functional benefits. Using a diluted, balanced liquid fertilizer once a month during the growing season promotes vibrant colors and healthy leaf development. Over-fertilization can be harmful, causing leaf burn or disrupting the plant’s natural growth rhythm. Paying attention to these details ensures that your Nerve Plant remains visually striking while continuing to improve your indoor environment.

Propagation and Expanding Your Indoor Garden

One of the most rewarding aspects of growing Nerve Plants at home is their ease of propagation. Fittonia responds well to stem cuttings, allowing gardeners to expand their collection without purchasing additional plants. By taking a healthy stem with a few leaves, placing it in water or directly into moist soil, and maintaining a warm, humid environment, new roots will develop within weeks. This not only gives you the opportunity to create a fuller indoor garden but also enhances the plant’s air-purifying effects as more foliage contributes to oxygen production and particulate capture.

Propagation also encourages engagement with the plant, deepening the sense of care and connection. As the new plants grow, arranging them strategically around the home maximizes both aesthetic appeal and environmental benefits. Multiple Nerve Plants in different rooms create a cohesive visual theme while subtly improving indoor air quality throughout the living space.

Integrating Nerve Plants into Home Decor

Beyond their functional benefits, Nerve Plants offer extraordinary decorative potential. Their intricate veining and compact growth habit make them ideal for terrariums, small pots, or mixed plant displays. Terrariums, in particular, provide the humidity Fittonia loves while creating a captivating miniature ecosystem that draws attention and sparks conversation. Pairing the plant with complementary foliage, mosses, or decorative stones can enhance both the visual appeal and the indoor environmental benefits.

In larger arrangements, Nerve Plants can serve as a ground cover for taller houseplants, adding layers of texture and depth to indoor landscapes. Their vibrant leaves contrast beautifully with darker greens, creating a dynamic visual interplay that enlivens any room. Beyond aesthetics, this layered approach can increase the collective capacity for air purification, as the interplay of multiple species contributes to a more resilient indoor ecosystem.

Seasonal Care and Long-Term Health

Maintaining a healthy Nerve Plant involves understanding its seasonal rhythms. During spring and summer, the plant experiences active growth, requiring consistent watering, adequate light, and occasional fertilization. In autumn and winter, growth slows, and the plant becomes more sensitive to overwatering. Reducing water and adjusting light exposure during these months prevents stress and supports long-term health.

Pruning is another essential aspect of seasonal care. Trimming dead or yellowing leaves not only improves the plant’s appearance but also directs energy toward new growth. Regular maintenance encourages a bushier, more vibrant plant, ensuring that it continues to thrive and contribute positively to indoor air quality year after year.

Psychological and Emotional Benefits

The presence of Nerve Plants in a home extends beyond the physical improvements to air quality. There is a well-documented connection between indoor greenery and mental well-being. Caring for plants can reduce stress, enhance focus, and create a sense of accomplishment. The delicate beauty of Fittonia, with its intricate leaf patterns and vibrant colors, adds a layer of emotional engagement that resonates on a deeper level than purely functional benefits.

In urban environments where natural greenery may be limited, Nerve Plants serve as a reminder of the outdoors, creating a soothing micro-environment. Their rhythmic growth and need for regular care encourage mindfulness and a gentle daily routine. Over time, these practices contribute to a healthier, more harmonious home atmosphere, complementing the plant’s tangible contributions to air quality.

Conclusion

Growing Nerve Plants at home is more than an exercise in decoration; it is a holistic approach to improving both your environment and well-being. From their unique, eye-catching foliage to their subtle yet meaningful contribution to indoor air quality, Fittonia embodies the fusion of beauty and function. By carefully considering location, light, humidity, soil, and care routines, anyone can cultivate a thriving collection of Nerve Plants that not only enrich the home aesthetically but also promote a healthier, more serene living space.

Their adaptability, ease of propagation, and emotional benefits make them an ideal choice for both novice and experienced plant enthusiasts. Whether displayed in a terrarium, as part of a layered indoor garden, or as a standalone accent, Nerve Plants transform spaces into vibrant, breathable, and emotionally uplifting environments. Investing time in their care is rewarded not just with visual delight but with the quiet satisfaction of contributing to a cleaner, fresher, and more harmonious home.

Yucca Cane Plant Care for Beginners: How to Keep Your Indoor Plant Thriving

The Yucca Cane Plant, with its striking sword-like leaves and sturdy woody stems, has become a favorite among indoor plant enthusiasts. Its dramatic silhouette can transform any dull corner into a vibrant, tropical-inspired sanctuary. For beginners, the plant’s resilience might seem like an easy advantage, but thriving Yucca Cane plants require more than just occasional watering. Understanding their needs, environment preferences, and growth habits is key to keeping them healthy and flourishing.

Understanding the Yucca Cane Plant

Before diving into care routines, it’s essential to understand the nature of the Yucca Cane Plant. Native to arid regions of Central and North America, this plant is accustomed to bright light and well-draining soil. Its thick, waxy leaves store water, which allows it to endure periods of drought. This adaptation makes it ideal for indoor environments where watering schedules can sometimes be inconsistent.

Yucca Cane plants are often confused with other Yucca species, but the indoor variety is typically grown for its ornamental value. The plant can reach impressive heights, sometimes up to 6 or 8 feet indoors, depending on pot size and care. Its slow, steady growth rate requires patience, but with proper attention, it becomes a striking centerpiece that adds height, texture, and elegance to a room.

Choosing the Right Spot in Your Home

Light is one of the most critical factors for a thriving Yucca Cane. These plants prefer bright, indirect light, though they can tolerate some direct sunlight. A spot near an east- or west-facing window is usually ideal. If placed in a dim corner, the plant may survive but its growth will slow, and its leaves can become pale or droopy.

Temperature also plays a vital role. Yucca Cane plants thrive in temperatures between 60°F and 80°F. They are not frost-tolerant, so keeping them away from drafty windows or air conditioning vents is crucial. If your home has fluctuating temperatures, consider placing the plant where conditions remain relatively stable.

Humidity is less of a concern for Yucca Cane than for tropical plants, as they are accustomed to dry environments. However, in extremely dry homes, particularly during winter, occasional misting can help prevent leaf tips from browning.

Potting and Soil Considerations

Choosing the right pot and soil is essential for your Yucca Cane’s health. These plants do not like sitting in waterlogged soil, which can cause root rot. A well-draining potting mix designed for cacti or succulents is ideal. If using a standard potting soil, adding sand or perlite can improve drainage.

The pot itself should have drainage holes to allow excess water to escape. While Yucca Cane plants can tolerate being slightly root-bound, selecting a pot that allows some room for growth encourages healthier root development. Repotting every two to three years helps maintain soil quality and allows the plant to expand comfortably.

Watering Your Yucca Cane Plant

Watering is one area where beginners often make mistakes. Overwatering is the most common cause of problems. Because Yucca Cane stores water in its thick leaves and trunk, it does not need frequent watering. During the growing season, typically spring and summer, water the plant thoroughly but allow the top two inches of soil to dry out between waterings.

In fall and winter, the plant’s growth slows, and watering should be reduced. Consistently soggy soil can lead to root rot, while overly dry conditions can cause leaf tips to turn brown. The key is to strike a balance: water when the soil is dry but avoid leaving the plant sitting in excess water.

Fertilizing for Optimal Growth

Although Yucca Cane plants are not heavy feeders, they benefit from occasional fertilization. During the active growing months, feeding the plant once a month with a balanced, water-soluble fertilizer supports robust growth and vibrant leaves. Avoid fertilizing during the winter dormancy period, as this can stress the plant.

For beginners, choosing a fertilizer with equal parts nitrogen, phosphorus, and potassium works well. Organic fertilizers or slow-release pellets can also provide steady nutrition without the risk of overfeeding. Healthy fertilization contributes to the plant’s natural resilience and encourages new shoots to emerge from the base.

Pruning and Shaping Your Yucca Cane

Pruning may seem unnecessary for a hardy plant like Yucca Cane, but it can improve both health and aesthetics. Removing dead or yellowing leaves prevents disease and keeps the plant looking tidy. For taller specimens, trimming the top can encourage branching and create a fuller appearance.

Pruning is best done with clean, sharp scissors or pruning shears. Cuts should be made close to the stem but not flush, to allow the plant to heal naturally. Beginners often worry about pruning, but Yucca Cane is forgiving and responds well to careful trimming. Regular attention to leaf health and structure ensures the plant maintains its striking form.

Propagating Your Yucca Cane Plant

One of the rewarding aspects of caring for a Yucca Cane is propagation. The plant produces offsets, also known as “pups,” which can be separated from the mother plant and grown independently. Another method is stem cuttings: cutting a healthy stem section, letting it callus over, and planting it in well-draining soil.

Propagation requires patience, as new growth can be slow. However, successfully growing a new plant from a cutting is immensely satisfying and allows you to expand your indoor garden without purchasing additional plants. For beginners, starting with a single cutting or pup ensures manageable success while building confidence in plant care.

Dealing with Common Issues

Even though Yucca Cane is relatively low-maintenance, beginners may encounter a few common problems. Leaf browning or curling is often a sign of improper watering, insufficient light, or dry air. Adjusting care routines usually resolves these issues quickly.

Pests such as spider mites, mealybugs, and scale insects can occasionally affect indoor Yucca plants. Regular inspection and gentle cleaning of the leaves with a damp cloth can prevent infestations. In stubborn cases, horticultural oils or insecticidal soap can be used safely indoors.

Root rot is the most serious problem, often caused by overwatering or poor drainage. If the base of the plant becomes mushy or leaves start dropping excessively, it may be necessary to repot the plant and trim away affected roots. Prevention through proper watering and soil selection is far easier than treatment after the fact.

The Aesthetic Appeal of Yucca Cane

Beyond the technical aspects of care, the Yucca Cane Plant adds a dramatic visual element to your home. Its tall, architectural form draws the eye, while the glossy, sword-shaped leaves provide texture and contrast. The plant works well in modern, minimalist spaces as well as bohemian or tropical interiors.

Placing the plant in a decorative pot can elevate its visual impact. For a natural look, terracotta pots complement the earthy tones of the stem, while sleek ceramic containers offer a contemporary aesthetic. The plant’s ability to adapt to different interior styles makes it a versatile choice for beginners looking to add a focal point to their living spaces.

Creating a Routine for Long-Term Success

Caring for a Yucca Cane plant successfully is largely about establishing a routine. Checking soil moisture, inspecting leaves, and rotating the plant occasionally to ensure even light exposure creates a predictable rhythm that supports long-term growth. Consistency builds confidence for beginners and reduces the likelihood of common mistakes.

Observing your plant and responding to its subtle signals—slightly drooping leaves, slow growth, or browning tips—helps you fine-tune care. Yucca Cane is resilient, but attentive care ensures it not only survives but truly thrives, rewarding you with years of beauty and presence in your home.

Conclusion

For beginners, the Yucca Cane Plant offers the perfect combination of dramatic appeal and manageable care. By understanding its light, water, and soil needs, paying attention to growth cues, and creating a consistent routine, anyone can cultivate a thriving indoor Yucca. Its striking form, resilience, and adaptability make it an ideal choice for those new to indoor gardening. With patience, observation, and a little nurturing, your Yucca Cane will become a vibrant, long-lasting companion that elevates your living space and brings a touch of natural elegance indoors.

Caring for a Yucca Cane is not just about maintenance—it’s about creating a connection with a living element in your home. Every new leaf and every subtle growth spurt is a reminder of the care you’ve invested. For beginners willing to learn and observe, the Yucca Cane Plant transforms from a simple decorative piece into a source of satisfaction, beauty, and even tranquility.

« Older posts Newer posts »